
Henry Quach
Optical EngineerAccelerated Corrosion of Copper-Infused PLA
Introduction
You can intentionally rust metal-filled plastic filaments. Some material properties that cannot be replicated with typical pure plastics include sheen, surface roughness, magnetizability, and chemical susceptibility. In this set of experiments, a deliberate corrosion process 'passivates' a beautiful patina finish atop an otherwise unmodified FDM print. On an oxidized or corroded copper surface, the beautiful blue-green is a combination of reduced copper hydroxide (blue) and copper carbonate (green). Below is a rusted-patina boaty I made from Protopasta's CopperFill PLA with a solution of white distilled vinegar and table salt. Based on the initial results, I had a unique take on the Mandalorian's Beskar "Steel" ingot.
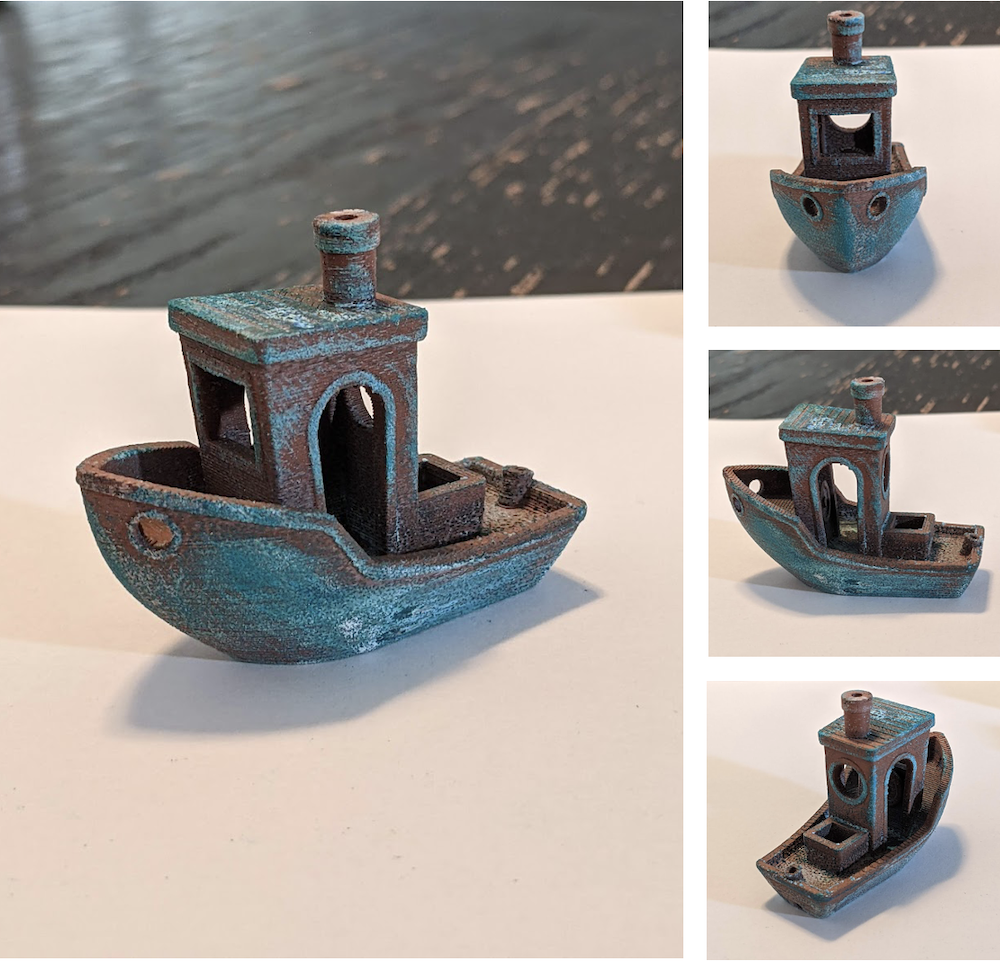
Figure 1. This beautiful 3DBenchy was printed from CopperFill at 4000mm/min, 0.2 mm z layer height, and 3 outer perimeters. I sanded the outer hull, top, and flater polishable planes with 60 grit sandpaper. Overhanging edges, like at the lip of the hull, demonstrate greater crystal precipitates because of the pooling of liquids. Diverse drip, pooling, and evaporative behavior at different part geometriescome from the interplay of gravity and surface tension based on the drying print's orientation.
Specialty Nozzle: Nozzle X
Like regular glow-in-the-dark (GITD) filaments, metal-infused filaments designed for a particular surface appearance are also abrasive. The brass nozzle in the original MendelMax design was ideal because it has excellent thermal conductivity - it is easy to melt the continual march of filament into the hotend and achieve a fast printing rate. Unfortunately, brass is a relatively soft metal and all heterogenous metal-infused plastics chew through the nozzle tip within hours of printing. Fortunately, the Olsson Block (which is common to most consumer nad prosumer FDM printers) offers a M6 threaded interface to swap in different nozzles. One example is hardened steel nozzles which are much harder than brass nozzles. In the past, I had installed a tool steel nozzle onto my Ultimaker hotend, but the nozzle took longer to heat up and was more susceptible to thermal non-uniformity issues. This isn't a big deal for singular print jobs, but between many jobs, the time adds up.
When I'm 3D printing for leisure (and not optics mounting for research), I might change out filaments 3-4 times over a single afternoon. I print at up to 5500 mm/min, which I think is relatively quick for high-quality prints. If I need to change out nozzles to prevent wear from certain materials, I don't want to continually recalibrate the bed Z-height and adjust my print profiles on Simplify3D. So I ended up choozing e3D's Nozzle X which is inherently tool steel, but makes geometry changes to compensate heat transfer throughput and achieve similar thermal behavior as regular brass nozzles. The nozzle was about $30, but to me it was money well spent. Re-adjusting all my print settings was easy. Mostly, it was first layer parameter adjustments and increasing by nozzle temperature by 5 C to 215 C.
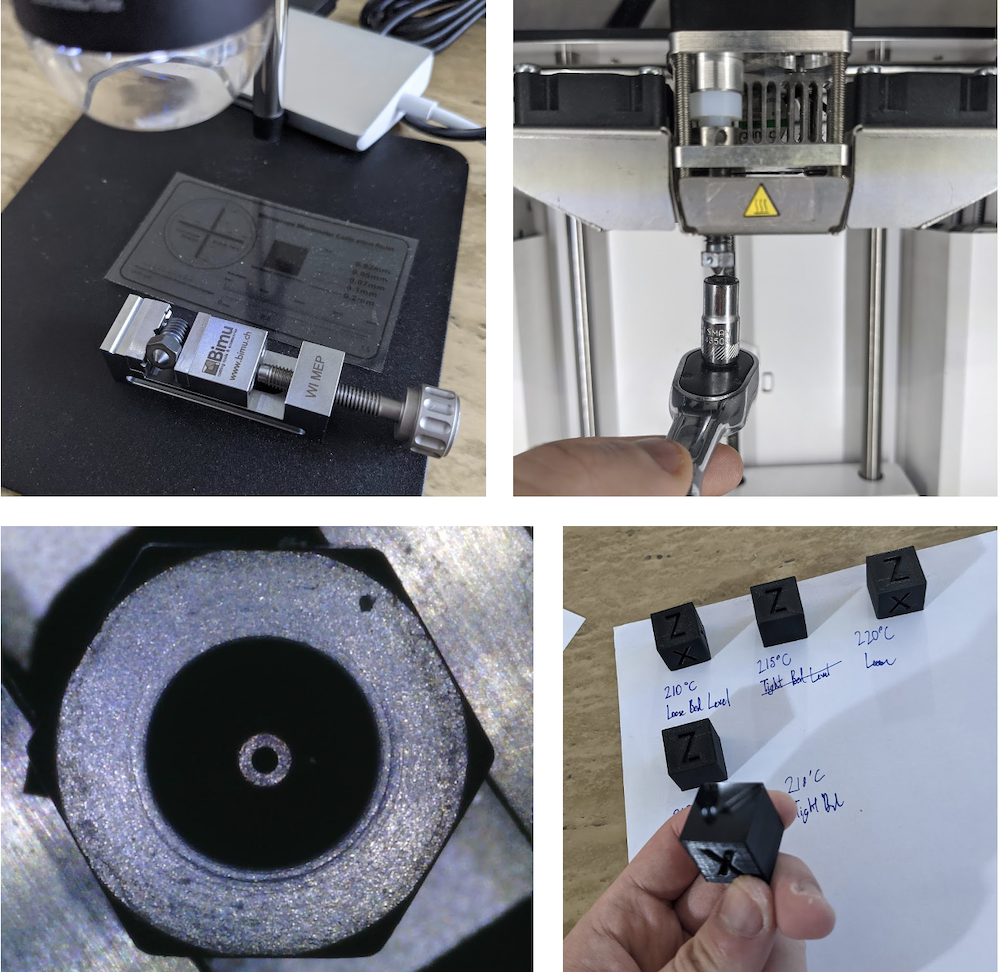
Figure 2. Nozzle X changeout was pretty easy. I examined the nozzle under a microscope to witness the beautiful finish that all nozzles lose when they begin their performance lifetimes. I printed the classic XYZ calibration cubes at a side length of 20 mm to evaluate bed adhesion, first layer elephant's foot, and oozing. All cubes were decent and the 210 C and 215 C case were indistinguishable. Bottom layers fully conformed to the glass buildplate and became specularly reflective and even image-forming. I adjusted bed level distance between nozzle tip and bed between 0.001" and 0.0015". Evidently, using the tight bed height distance was more optimal for print because of better first layer uniformity and appearance.
Copperfill Experimentation
Lulzbot, the 3D printing subreddit, and a bunch of other great 3D printing forums recommended mixing distilled white vinegar and common table salt. Salt was added into the solution until saturation, or when solids stopped dissolving into the liquid. Printed workpieces can be dunked, wiped, or sprayed with the concentrated corrosion liquid. Unfortunately, the corrosion process requires oxidation, so full immersion isn't very effective at all. Diffusion is the primary mechanism for corrosion so a faster interfacial exchange requires a more efficient interface where all players are present and nearby. Iterative spraying proved itself as the most effective technique.
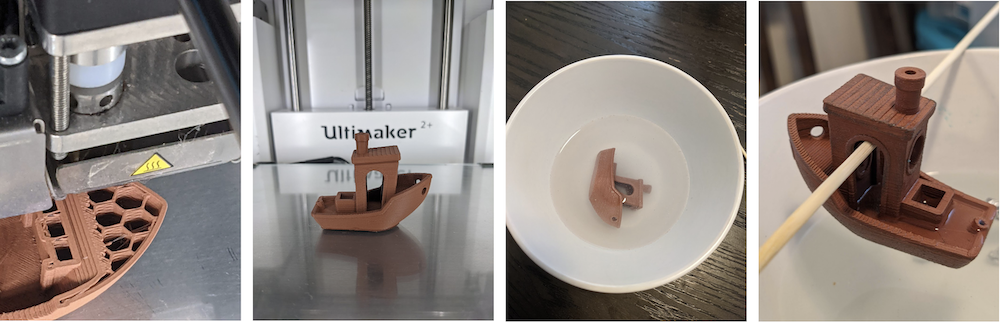
Figure 3. Pictures of the print, dunking, and kebab'ing of the boaty.
The patina outcome was excellent (See Figure 1). The blueish green patina characteristic of aged copper made the 3Dbenchy appear painted or even like aged metal. Somehow, I do wish I made the print smoother with finer sanding because the layer lines were still visible.
To experiment more, I applied Brasso and #00 fine steel wool to four copperfill XYZ calibration cubes. I sanded with pseudo-random orbital motions (as a optical fabricator would be familiar with) with successfully longer dwell times.
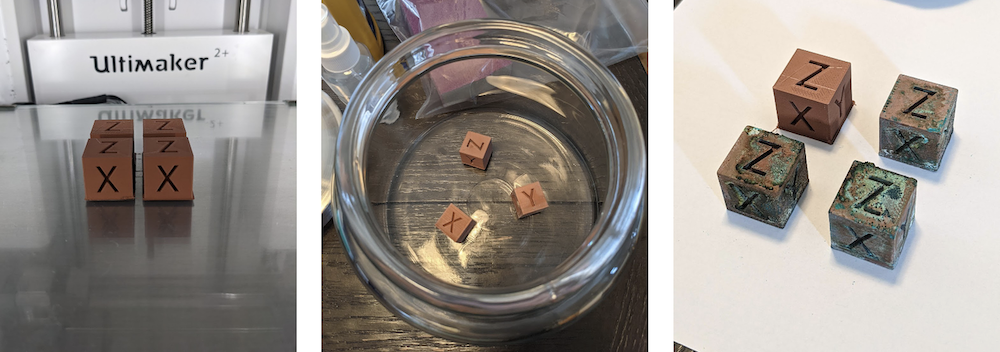
Figure 4. I poured some classic corrosion liquid into a sealed jar. I chose a sealed jar in fear that other parts in my kitchen would start corroding too. A thin layer of liquid always touched one side of a cube, and I rotated the cube orientation every hour or so.
One interesting consequence is that black oxides started forming because the steel wool corrodes black. I really did not like this accrual, because it competed with for the same surface area I wanted the green and blue crystals to begin forming. Still, I don't know why a cool orange corrosion precipate did not appear, as corroded steel usually does.
Variations of the Beskar
As a fan of the Mandalorian series, I had no choice but to make SUNKEN TREASURE BESKAR. Beskar ingots are valuable material blanks with a nuanced history in Star Wars lore. Frontal striations are akin to that of Damascus steel. Some really nice people on Thingiverse have made variations of this pattern. Of course, you need to print this vertically to preserve the surface height variations of the damascus pattern. I printed this with Ultimaker Silver, Polyalchemy Gold, and finally the ProtoPasta Copperfill.
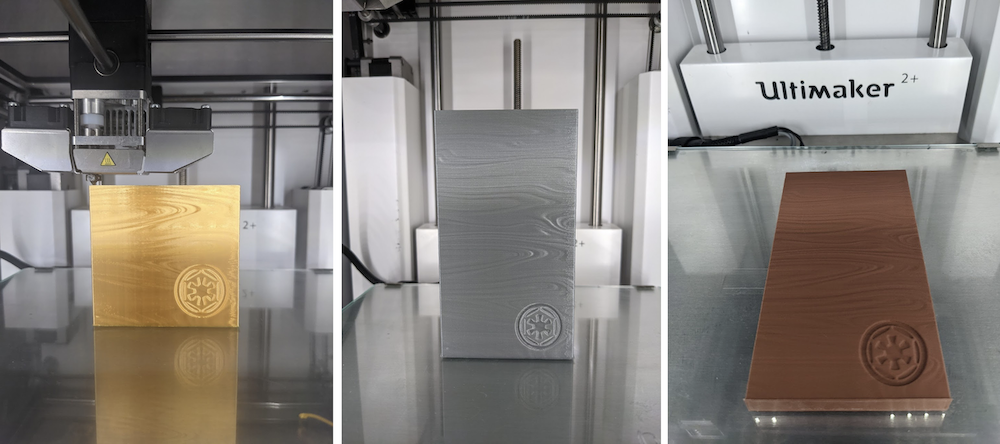
Figure 5. Different beskar ingots. The copper one was laid flat after printing, not printed in that oriented.

Figure 6. I totally forgot that metal was heavier than plastic, so the spool had less filament length than I was expecting. I added one extra perimeter layer around the Sunken Treasure Beskar (CopperFill), which weighed more than twice that of the printed silk gold ingot.
The Creation of Sunken Treasure Beskar
I did the classic sanding from 60 to 100 to 220 to 400 grit of the flat, prismatic ingots. I sanded across the plane at psuedo-random lengths and orientations. Smoothing was very noticeable even after the first one, but this is dominated by the effects of particle scattering at the surface. Yet, the purpose of this was not immediate superficial aesthetic gains, but an increase in surface area for corroded solid crystals to form.
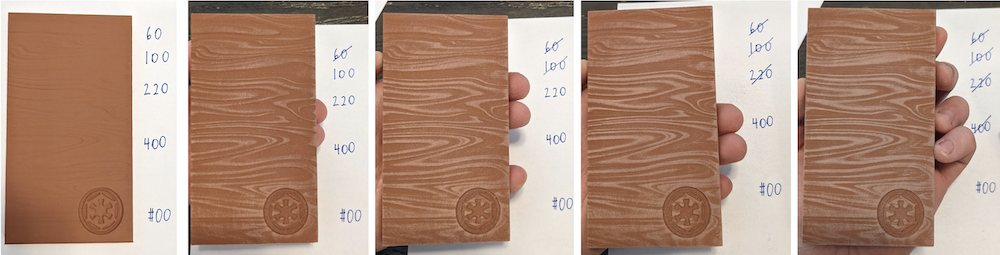
Figure 7. Sandpapered with labels. Damascus patterns look brighter because more light is scattered from the fine plastic/copper particlate.
Now, using the 'corrosion spray', crystal nucleation began! Honestly, the blue dots are kind of tryptophobic. I hypothesize that some solid grains of salt may possible have gotten straight onto the ingot and that formed those discrete crystals. I'm still not really sure, but those uniform dots showed up on the boat too.
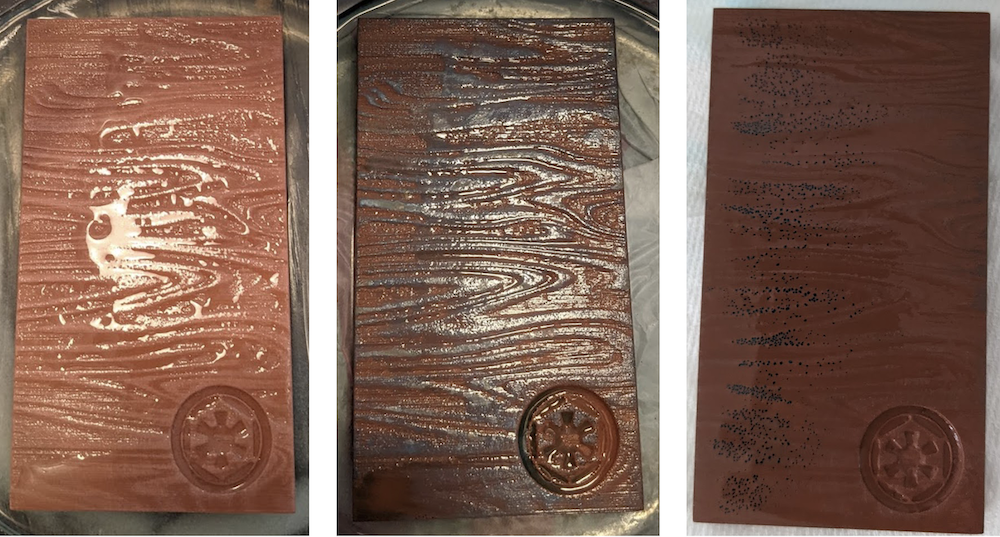
Figure 8. Before and afters. Because of the uniform spot sizes, I had to take a closer look under the microscope and wow it is SUPER COOL. The crystals actually grow quickly after initial nucleation. I sprayed on the corrosion spray every few hours to encourage crystal growth.
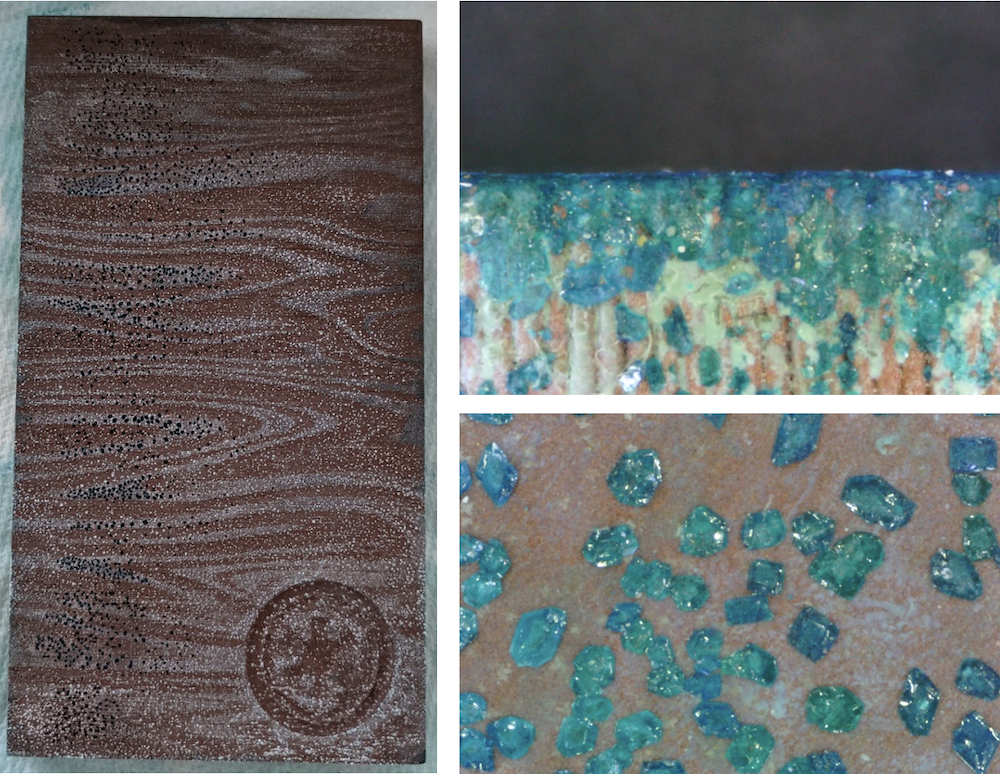
Figure 9. Et tu, Walter White?
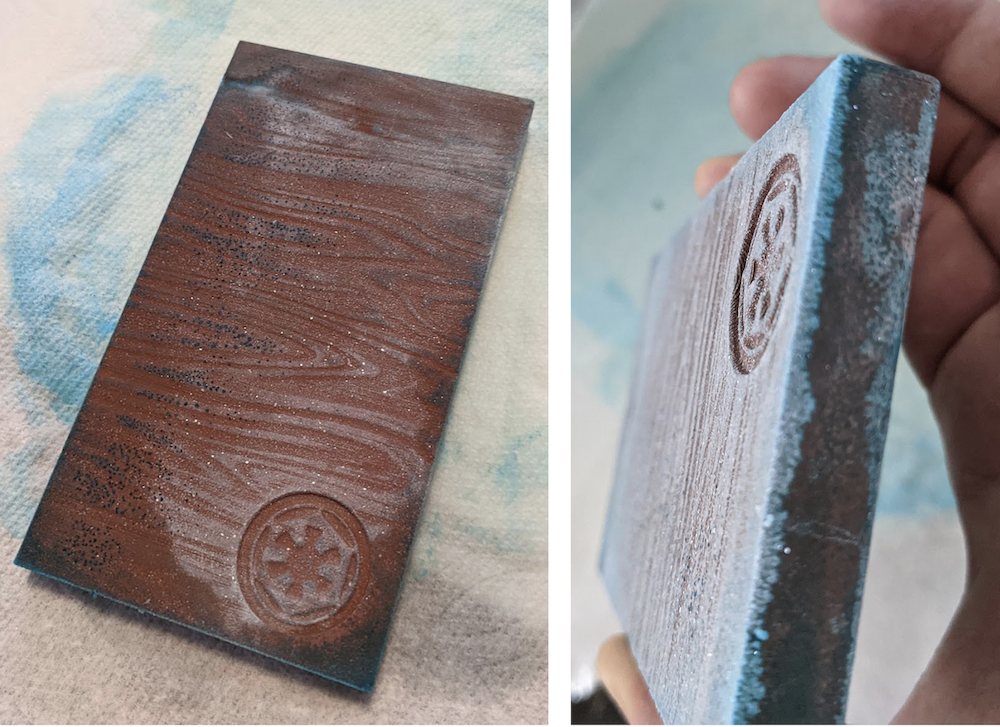
Figure 10. Not there yet but pretty cool edges.
Final Beskar
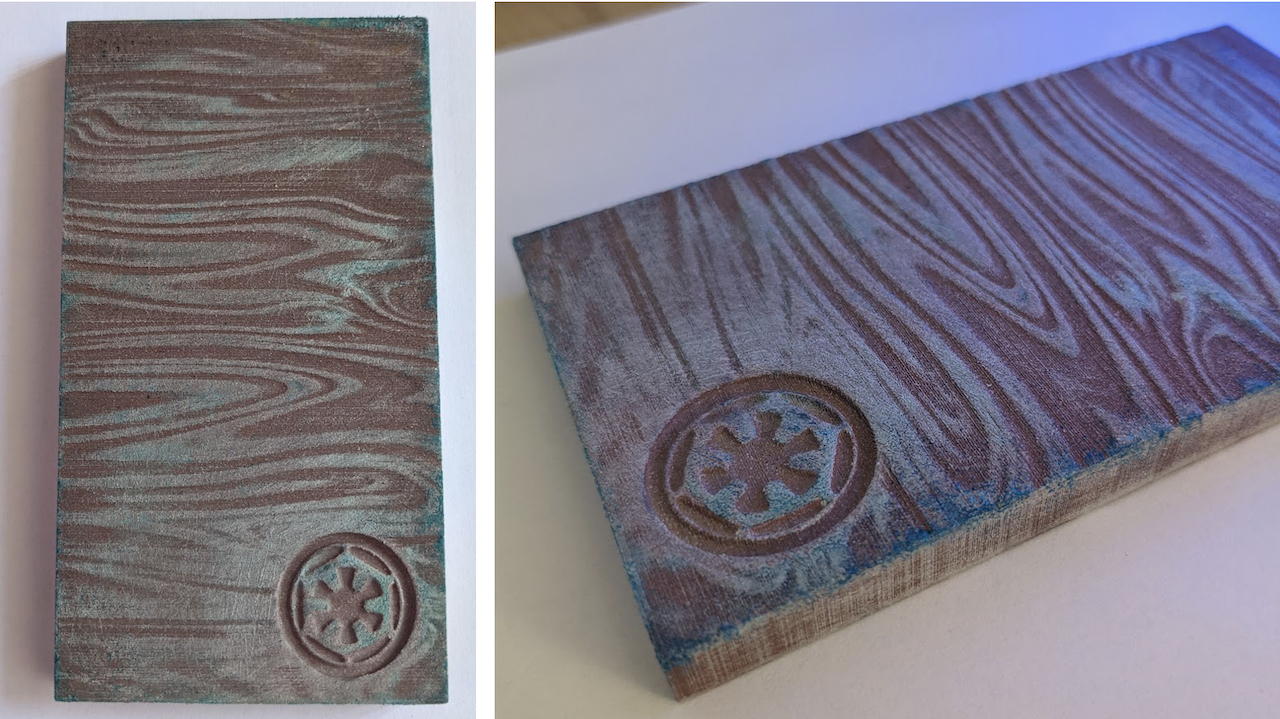
Figure 11. Final sunken treasure beskar.
After 4 days of iteratively flipping and drying, here is where I got to! I think if I give some more time to spraying, I can encrust a thicker layer of copper carbonate onto an entire corner. In normal daylight illumination conditions (~5000K), that is probably what is necessary to bring out the shiny blue of patina copper. However, just for pictures, illuminating with blue light really brings out the beauty in the corroded pieces. The spectral absorption and reflection properties of the precipitated solid are apparently kinder to higher contents of blue, so I used my Philips Hue lights to bring that out in the final ingot with no digital touchups.