-
Preparation
ABSTRACT
Phở is an aromatic beef noodle soup originating from Vietnam. Ensconsced between playful textures of star anise, cloves, coriander seed, and cinnamon is the unmistakably deep essence of dissolved marrow. This signature flavor cannot be forced out of the beef bones by a hard boil, but rather, can only be gently summoned by lengthy simmer. It is said that that professional Vietnamese kitchens will simmer their broths for up to 72 hours. For further information, the reader is advised to consult the literature review provided by Wales et al. (or more seriously, Andrea Nguyen's published book).
Here, I present the full narrative of my process - from informed ingredients selection at the local Asian grocer to serving bowls with rice noodles for friends. This living webpage documents my current technique to cook the perfect pot of pho.
MATERIALS
Pho ingredients can be separated into four separate categories: beef bones, spices, bowl prep, and the literal cooking equipment. More uncommon ingredients are hyperlinked so that they can be more easily identified at the market. You need to get the ingredients right because, like other places worthy of celebration, Flavortown has an entrance fee.
Beef Bone Selection
Flavor is an emergent property. All spices added register into the final flavor, but the selection of bones is what endows pho broth with holistic depth. Different cuts - neck bones, knuckle, ribs, oxtail, femur - have different amounts of marrow, fat, collagen, and edible meat. Tougher, muscular cuts contain dense connective tissue, whose collagen eventually breaks down into flavorful gelatin. In contrast, meatier cuts add a seemingly irreducible fatty richness that remains even after coagulating and skimming the broth.
You will end up choosing a mix that balances these attributes, market availability, and your budget. For example, some online recipe authors use exclusively oxtail (possibly $10/lb!), while others primary use primarily leg bones (femur and knuckle at $1/lb) and mix in ribs or neck bones.
As a perennially destitute graduate student, I choose to buy 5 lbs of leg bones and then ~2 lbs of ribs/neckbones/oxtail. Weighed and bagged "beef leg bones" are available, refrigerated or possibly frozen in open, deep chests at the back of the Asian market. Ribs and neck bone are typically packaged and neighbor Western cuts of steak. Oxtail seems to require interaction with the butcher and therefore, communicating a specific cut. To that point, the word 'pho' has seems to hold meaning in the butcher's lingua franca, so I literally tell the butcher I am making pho and they laugh and know exactly what I am going for. See Figure 1 for what that my bone bix looks like.
Spices
As shown in Figure 2, you need 6 whole Star Anise stars, a 3-4 inch piece of ginger, two sticks of cinnamon, and a yellow onion. As shown in Figure 3, you also need yellow rock sugar (unprocessed cane sugar crytals), 60 mL of fish sauce (get the 3 Crabs" brand), dried cloves, 2 tablespoons of salt, 1 tablespoon of coriander seeds.
The star anise, cloves, coriander seeds, and cinnamon live in relative proximity and usually in stapled, clear plastic bags. The yellow rock sugar will come in a box labeled in Chinese.
Bowl Prep
You need a nice big bag of "Banh Tuoi", or rice noodles. Expect that 5 lb bag will be very sufficient for your a full 12-quart pot. As for vegetables, you want limes, white onions, thai basil, green onions, cilantro, and bean sprouts (not to be confused with soybean sprouts, which are similar but thinner and smaller). Also, buy pre-sliced beef brisket or beef tendon balls. Korean markets unsurprisingly sell these sliced cuts of beef brisket, and the beef-tendon balls can be found in frozen/refrigerated sections for ~$4-6 per 12-pack.
Equipment
Make sure you have a 12 quart+ stock pot, a frying pan, a mixing bowl, a strainer, a smaller pot to blanche the rice noodles, tongs, and a wire mesh skimmer. 8 quarts is simply not enough to hold your pho and you will have a bad time. Get a probe thermometer so you can check in on the temperature of your ribs/oxtail.
A note on the mesh skimmer: no matter where you go or what manufacturer you search for, there will probably be a "Prop 65" warning sticker. This is because mesh skimmers ubiquitously have titanium dioxide added to prevent corrosion. I have searched in vain for an alternative. See Figure 4 for my shopping cart.
METHODS I
Parboiling Bones
Your leg bones and even nicer cuts probably have 'gunk' that simply clouds your broth. So we rid of it now rather than at the end.
Thaw the leg bones in a mixing bowl, if originally frozen. Once unthawed, unceremoniously dump the contents from the bag into your stock pot (Figures 5), fill it with water so it just covers the bones, and put the stove on high until the water boils. This is called 'parboiling', which detaches excess chunks of fat and hanging ligaments. Once the water is boiling, retain the boil for ~10 minutes, and skim this dirty topical foam with a strainer. Then, dump the full contents of the pot through the strainer. Run cold water over the hot bones. Figure 6 shows the typical dirty clouds that are undesirable. For the moment, clean out your large pot of the dirty fat deposits (there's probably a lot of that) before dumping the cleaned bones (Figure 7) back in.Returning the Bones into the Pot
Use your tongs to place the hot bones back into the pot. Then fill the pot to ~75% full with water. The imprecision of this pour is fine because water will evaporate throughout the boil and you will likely be adding water more to the mix. I find that using a large measuring cup to add that final ~25% water is helpful as to not carry the entire 3/4 full pot from beneath under the sink spout to the stovetop.
Figures - Preparation
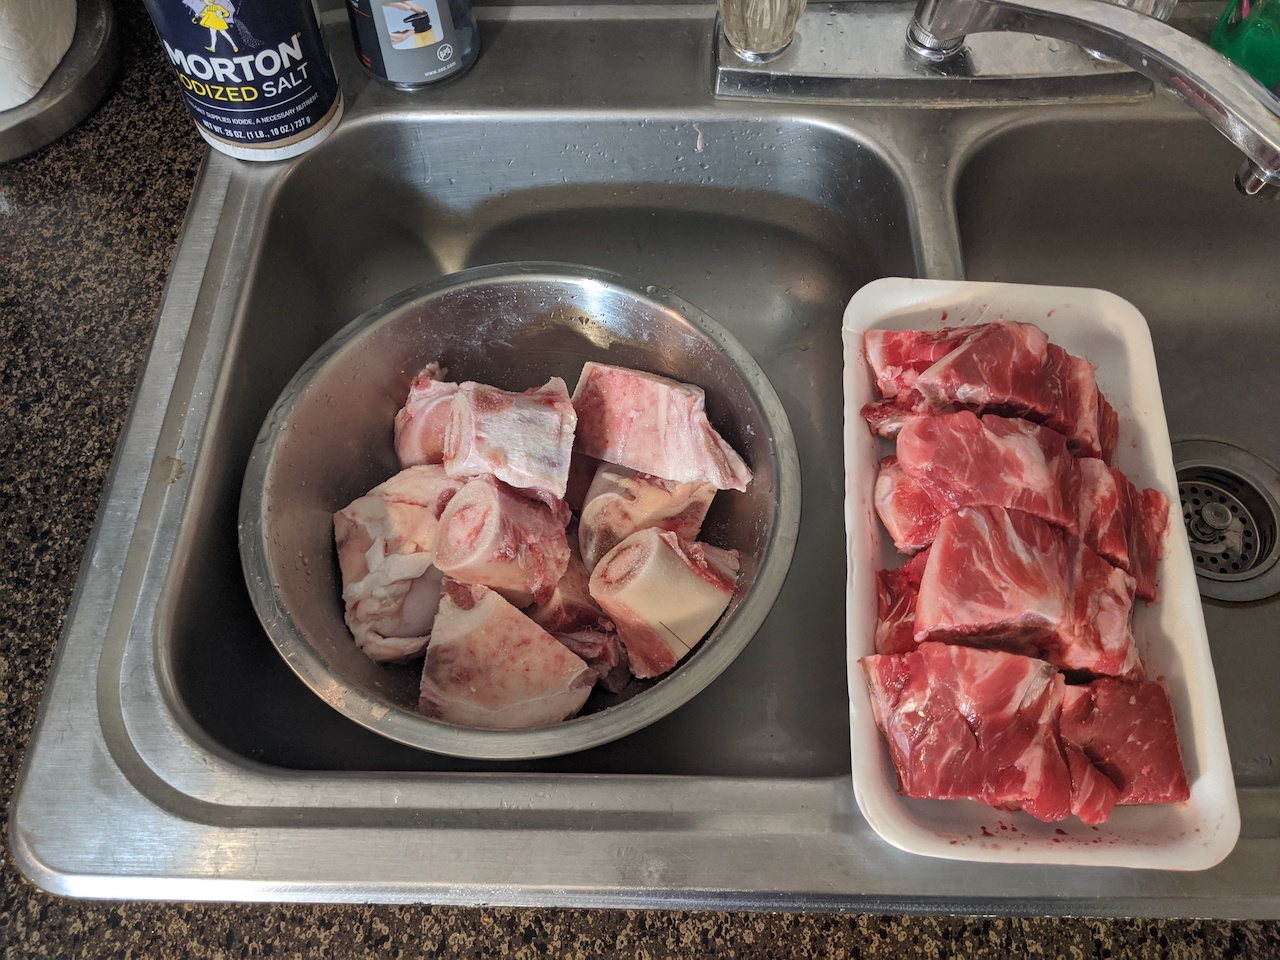
Figure 1. 5 lbs of femur/knuckle bones and 2 lbs of beef short ribs.
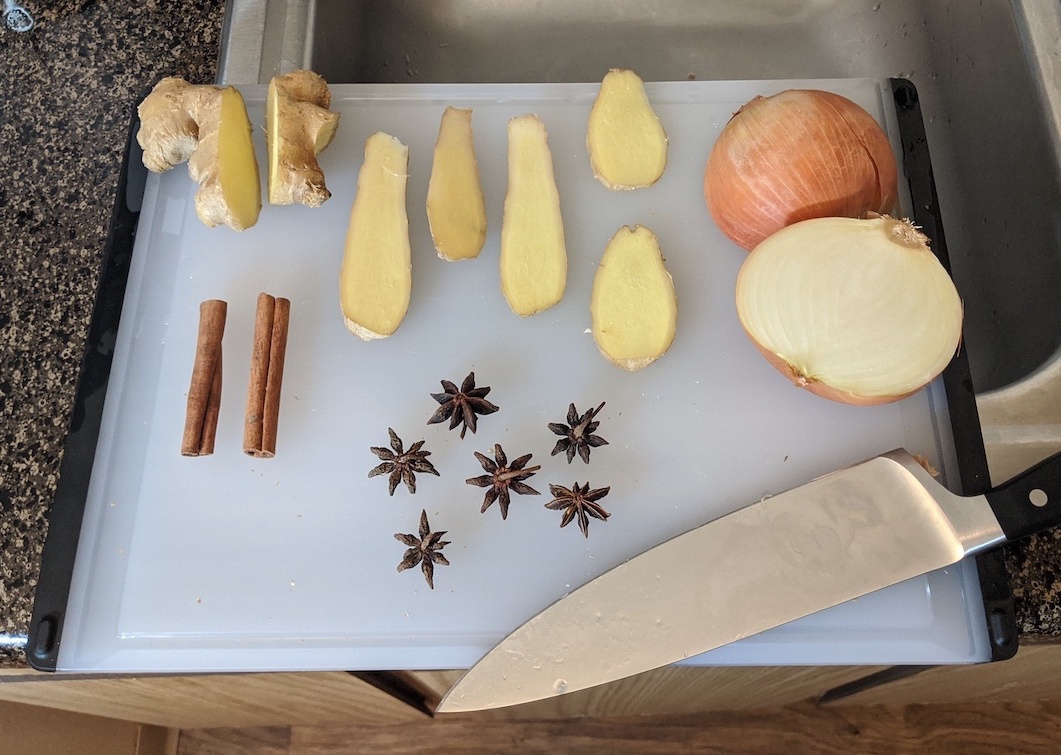
Figure 2. Spices laid out, Board 1.
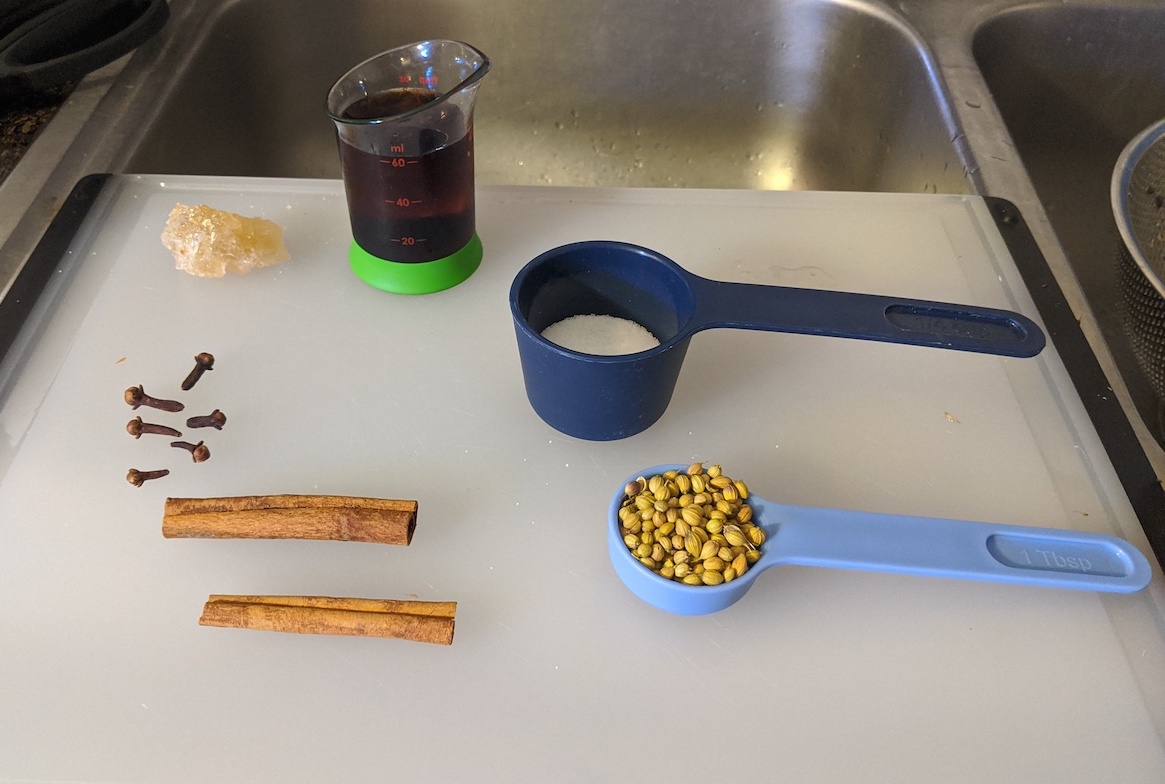
Figure 3. Spices laid out, Board 2.
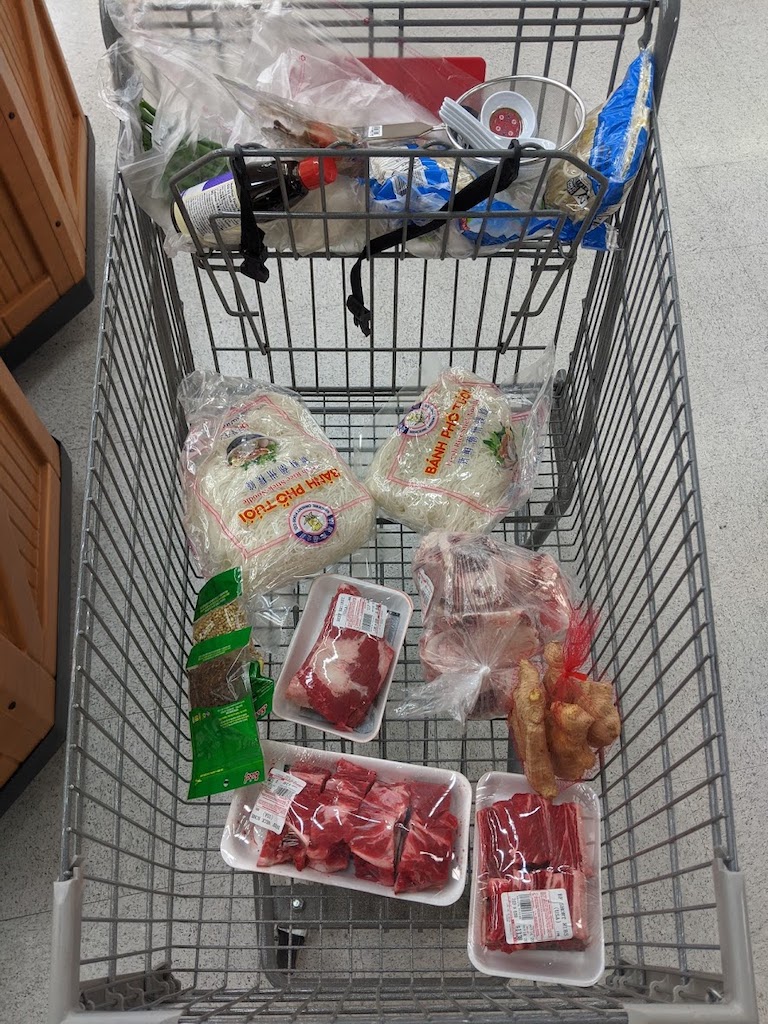
Figure 4. My shame, my shopping cart at Lee Lee International Supermarket.

Figure 5. A proper 12 quart pot. Anodized, but stainless steel pots have better uniformity.
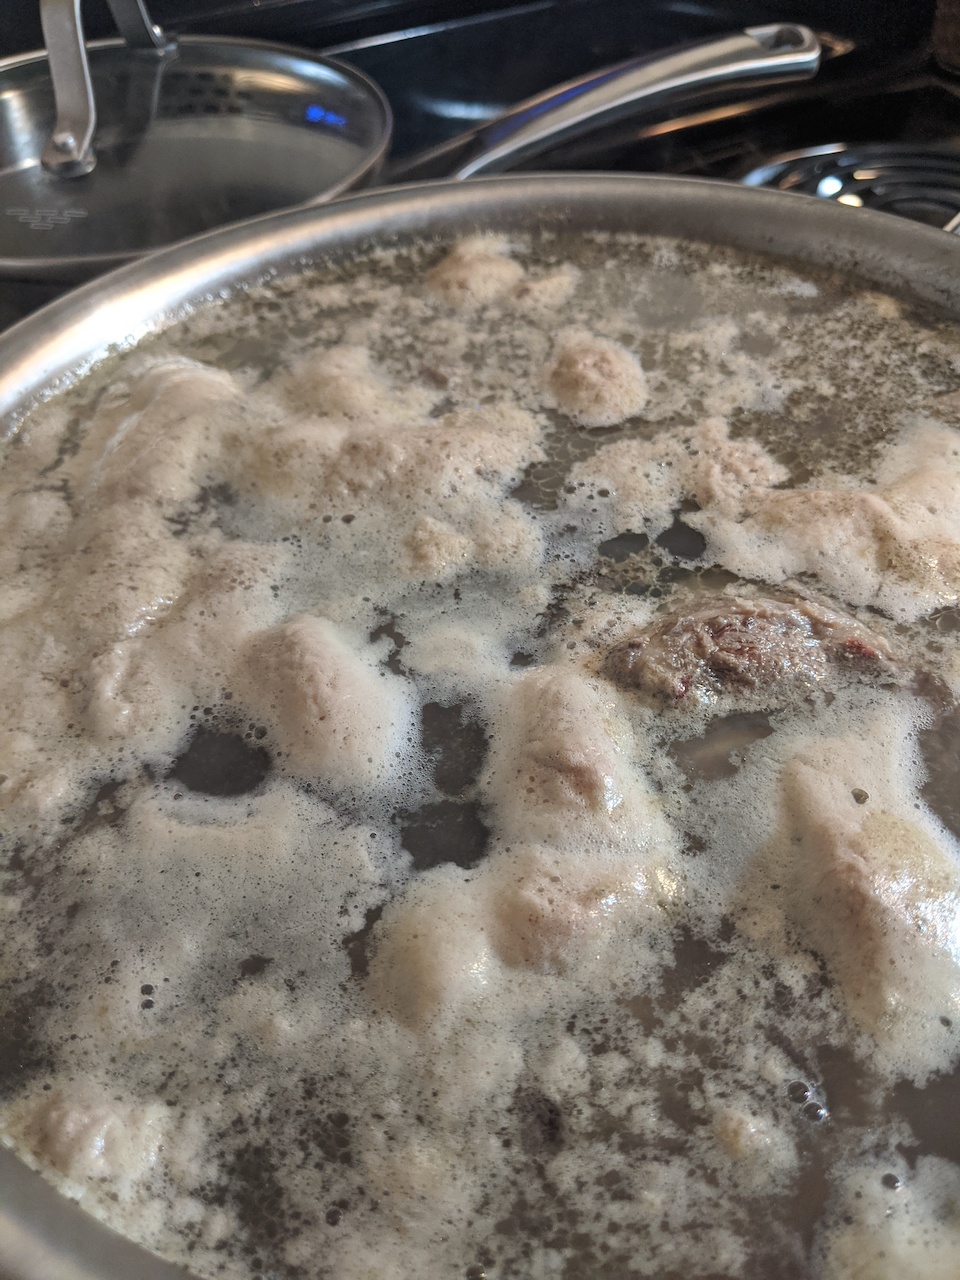
Figure 6. What the "gunk" looks like.
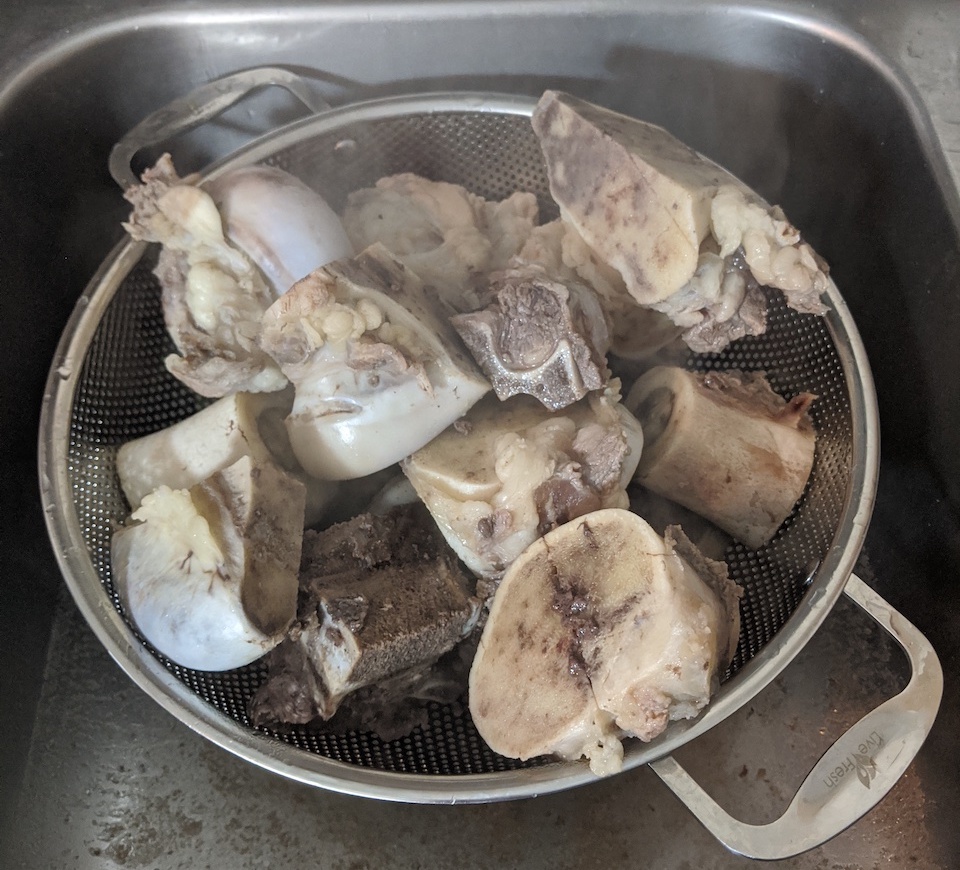
Figure 7. Cleaned knuckles and femur.
-
Short Boil
METHODS II
It is at this moment that we begin our walk into Flavortown. The bones are now relatively clean and can begin the first jaunt of boiling. I call this the 'short' boil because this is when I boil meatier cuts such as ribs. Here, the first batch of spices (Board 1, see Figure 2) is added.
Bring to a Simmer
Adjust the stovetop heat so that the pot comes to a simmer. This may take some time to realize because the amount of water is so massive - there is therefore a temperature lag between heat settings on the stovetop and thermal equilibrium within the pot. For expediency, it's okay to get the pot boiling first before lowering the temperature until bubbles just gently bubble and rise to the surface of the soup. I find that this relaxed simmering state more difficult to obtain for gas-powered stoves because the lower limit of the flame's heat is inherently higher than that of an electric stove's. This heat adjustment step might take up to ~25 minutes.
Add the Meatier Cuts
Once you've achieved the simmering boil, first count the number of ribs and then add to the mix. (You need to know how many to fish out from the broth later on.) Now the water level will rise to nearly 90% of the pot's level (Figure 8). The conclusion of the first boil is marked by when the ribs are ready. Hot ribs (Figure 9) continue to cook until they have cooled, so I recommend getting the ribs to about ~115 F before removing them. Medium rare beef is achieved at around 130 F, but if they are heated to that setpoint first, they will actually cook to 140F+, making the meat tougher. To test temperature, use tongs to remove a thick short rib sample from the the soup and use a probe thermometer, such as this one to pierce into the thickest part of the sample. Once the target temperature is reached, use tongs to hunt down all of the ribs you counted and run cool water over them to quickly stop the cooking process. Then soak all of the ribs in a separate container and store in the refrigerator until serving (Figure 10). This process is performed so that the meat does not dry up.
Charring the First Board of Spices
Wash the ginger briefly before slicing it longitudinally into thin 4" slices. I used a lot of slices my first time which helped balance out a rather fatty mix of bones. In subsequent runs, I used much less fatty bone selections and simply added two 4" slices. I slice on both sides of the ginger so that I have two sides to diffuse the ginger into the soup.
Slice the yellow onion in half and remove the outermost shell of each side. Bring out 6 star anise, two long sections of cinnamon. Place all into the frying pan and put on high heat. (Figure 11)The objective is to char these ingredients and bring out their smoky alter-egos. I recommend lidding the frying pan, or turning off your fire alarm and keep an eye out for smoke. When you hear the 'crack' of the cinnamon stick, it will be an excellent point to pour the contents of the pan straight into the stock pot (Figure 12). Be sure to turn the frying pan off now and bask in the rich aroma now eneveloping your entire house.
Based on the timing of the ribs, you can add the spices while the ribs are cooking. Use the tongs or a silicone spatula to mix the spices. Don't agitate the water too much though - if the onion shells fall apart, it distintegrates faster and eventually clouds the broth.
Figures - Short Boil
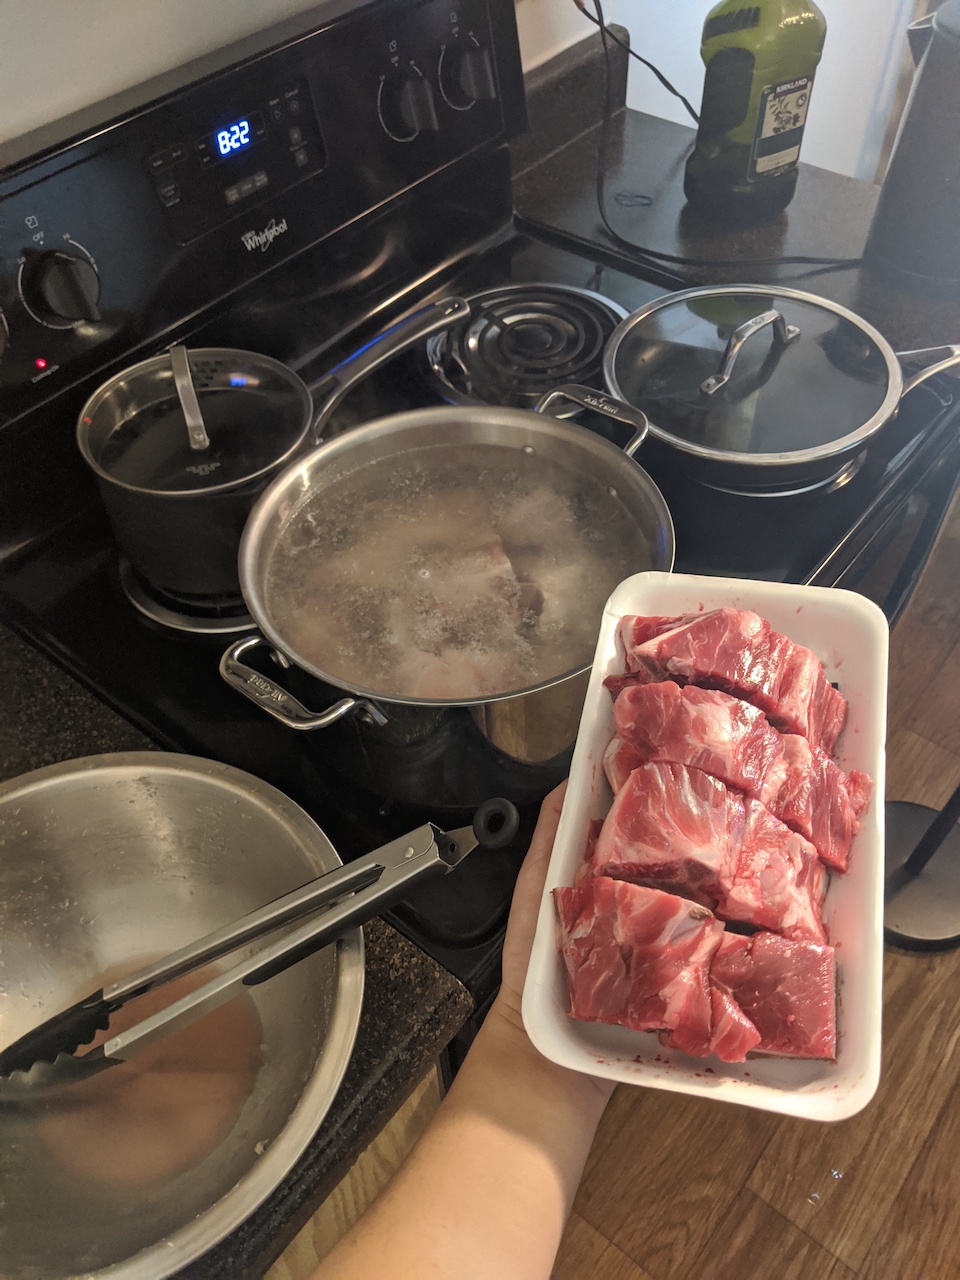
Figure 8. Ribs being added into the cleaned stock.
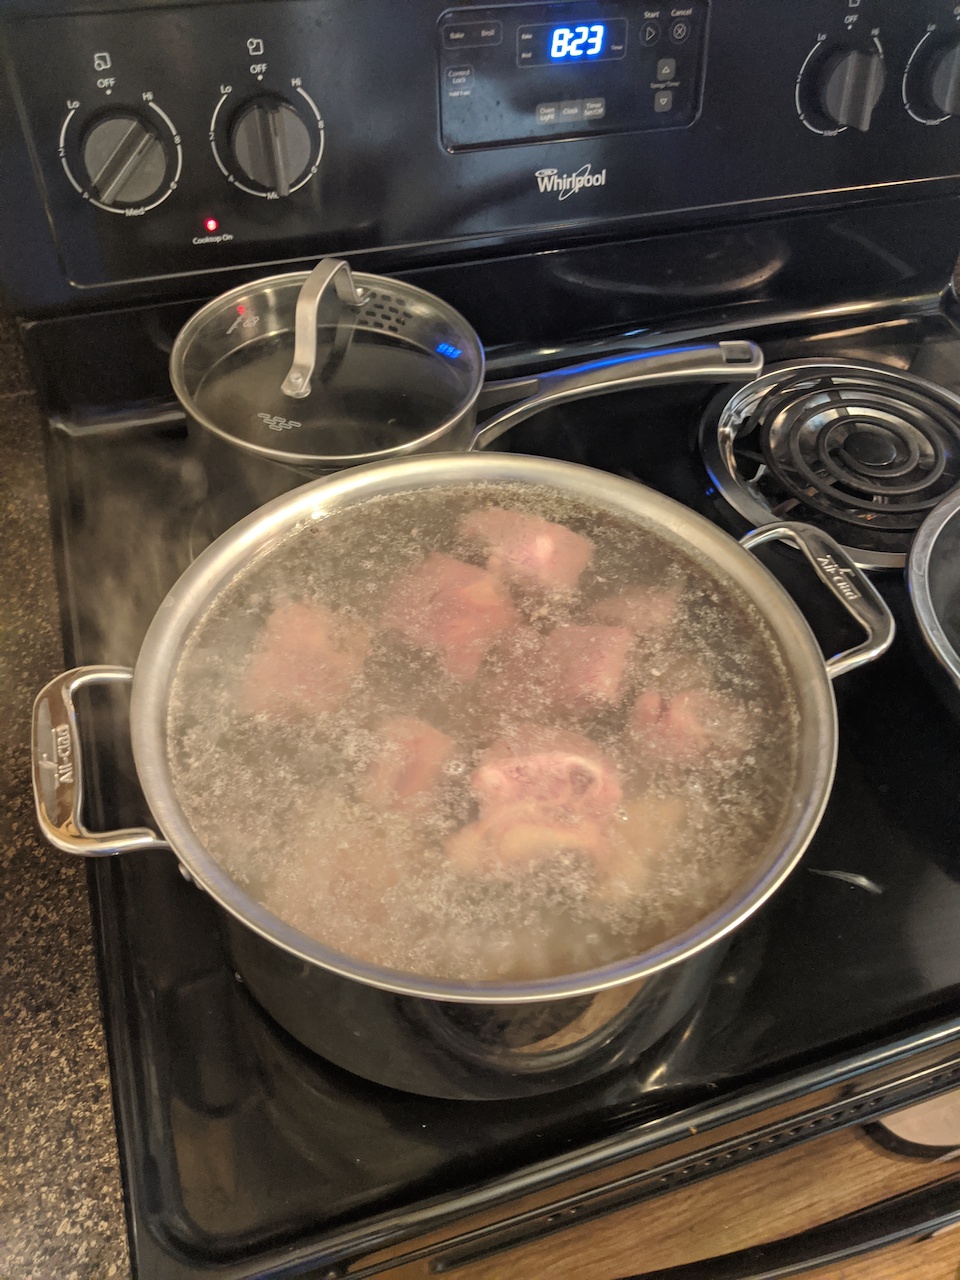
Figure 9. The water level, momentarily, is alarmingly high.
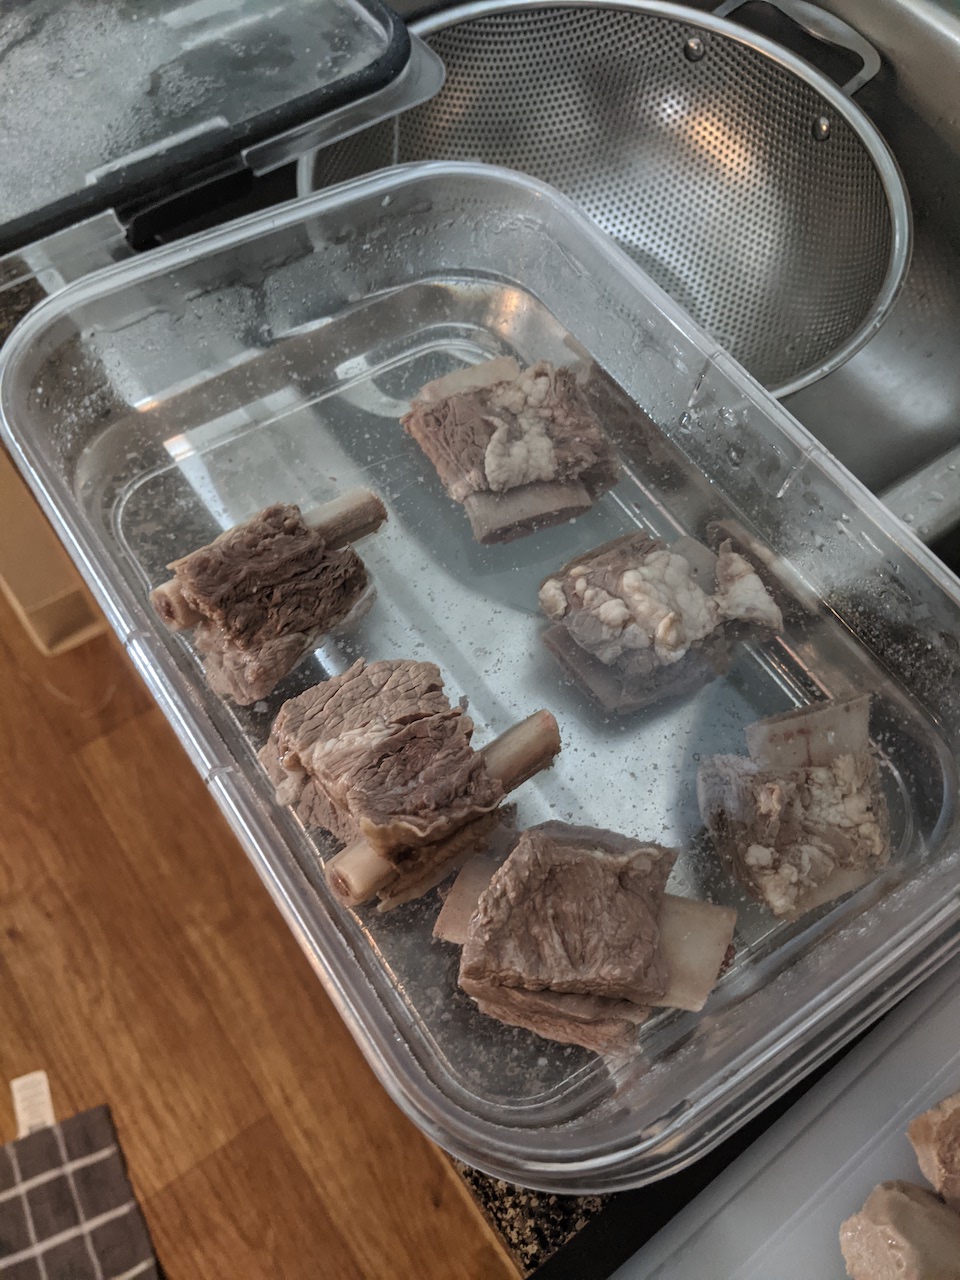
Figure 10. Removal of the ribs and soaking into a bath of water.
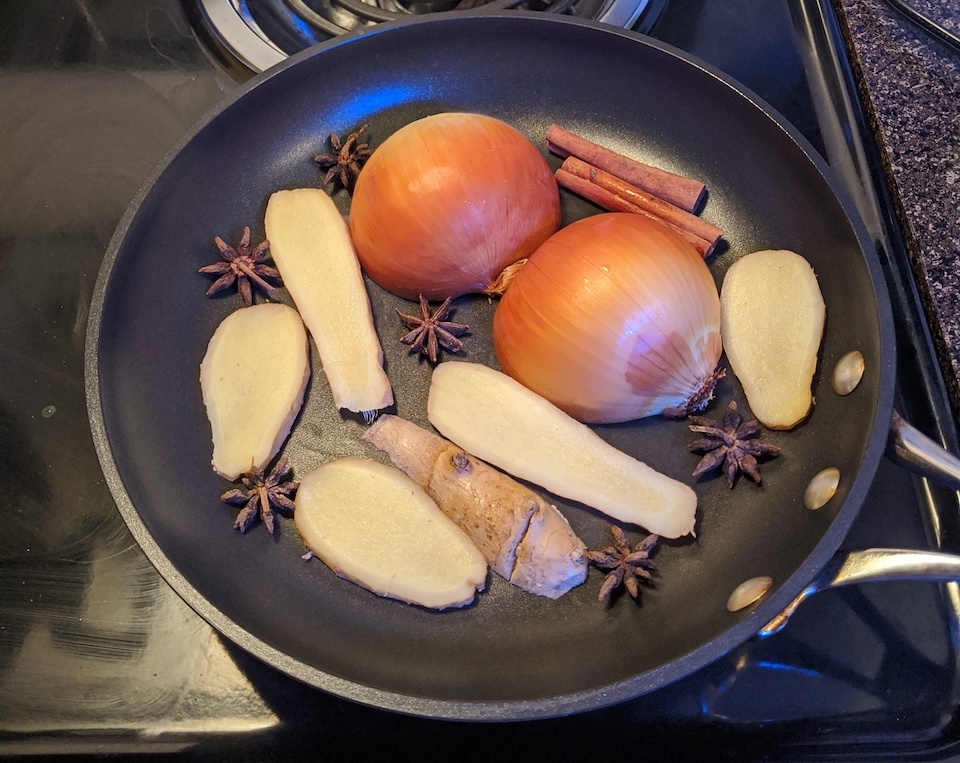
Figure 11. Charring of the spices.
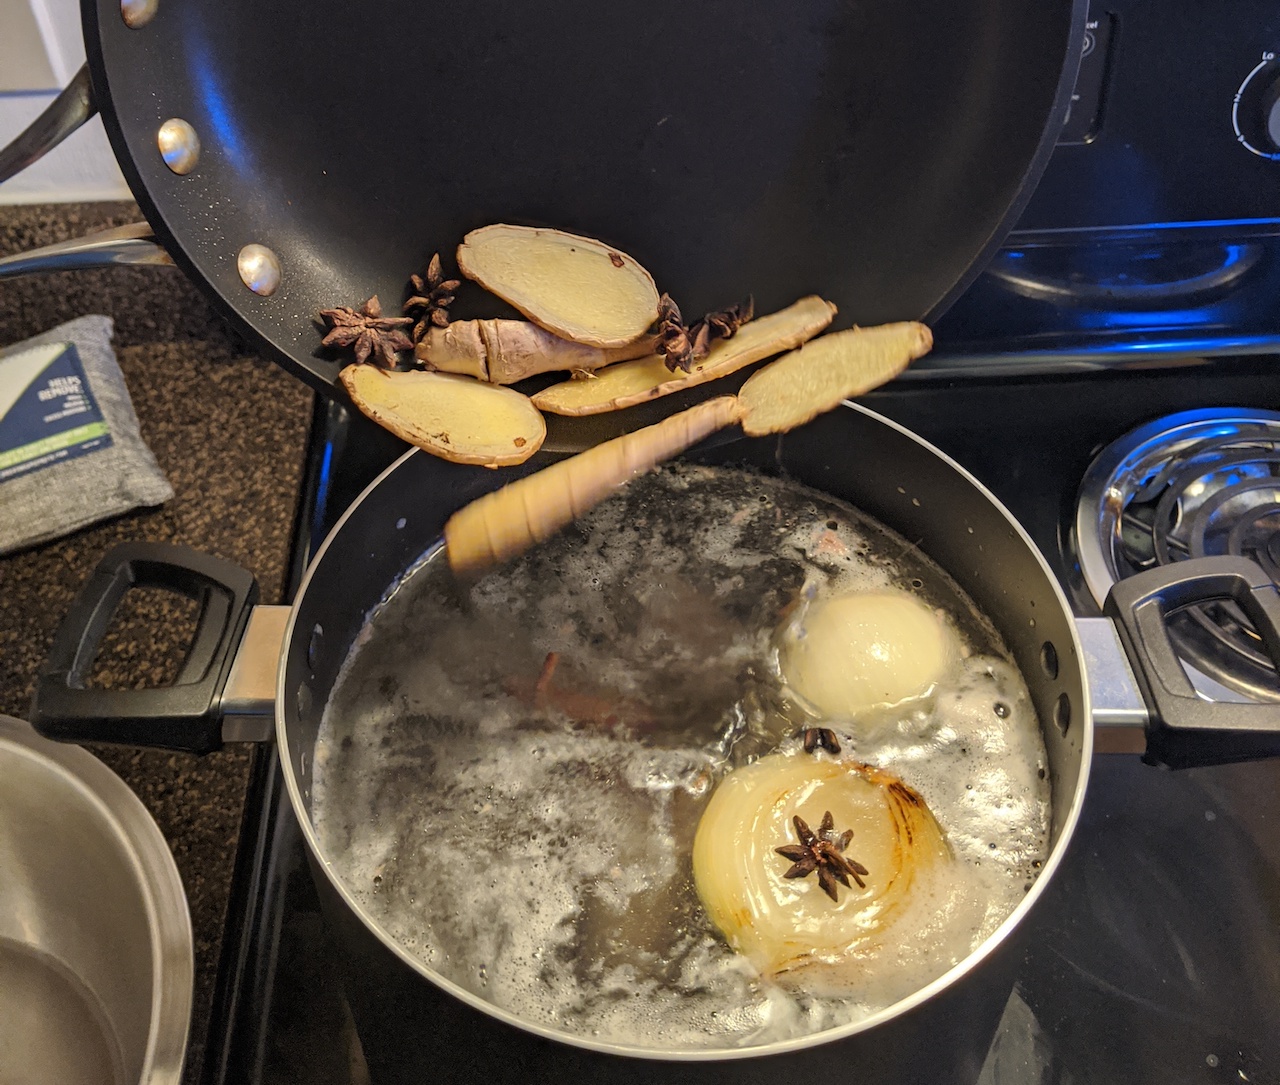
Figure 12. Unceremoniously combining the spices and the boiling broth.
-
Long Boil
METHODS III + MAIN EXPERIMENT
We are taking the long walk through Flavortown. This is the long haul and the inveigling of the beef essence from its bones. So far, we are 2 hours into the process and a third of the way through.
Simmering + Skimming + Refreshing the Water
The long boil begins by adding a small section of rock sugar (two sugar cube's worth), 6 cloves, 60 mL of fish sauce, 1 tablespoon of coriander seed, and 1.5 tablespoons of salt. The salt 0.5 tablespoons is withheld until the end when adjustments are made. Mix in these well. The coriander seed will float to the surface, as will the onions and the cloves. It should look something like Figure 13.
Set a timer for every thirty minutes. Come back and skim the amorphous, semi-solid fat that rises to the surface. The heated gelatin is what gives pho its flavor, so don't worry about sifting and removing these amphibious remnants. As you a return every thirty minutes, you'll notice the flavor slowly change until it rapidly changes by the 5th total hour. Long chains of collagen will present themselves and show reluctance to break as you skim across them. They will show even more reluctance by the 7th hour. (Figure 15)
The water inevitably evaporates, but we can refill the water levels. It doesn't straightforwardly dilute the soup because the beef essence doesn't evaporate like the water does. Thermodynamically-described, water only evaporates at the top-most layer of the broth and the heavier gelatinous extraction sinks and accrues.
Figure 16 shows these thicker chains that are emphatically not what we filter out with the skimmer. As you skim towards the end, you will notice that the gelatin slowly percolates from the wire mesh and you will need to making 'swirling' motions to accelerate the process. Don't worry if you take out floating coriander seed or petals of flayed onion while skimming because that's inevitable. But avoid removing the cloves and star anise. Trying out spoons of soup (hopefully separate spoons, you filthy animal!!!), the broth should taste pho-nomenal by the 8th hour.
Figures - Long Boil
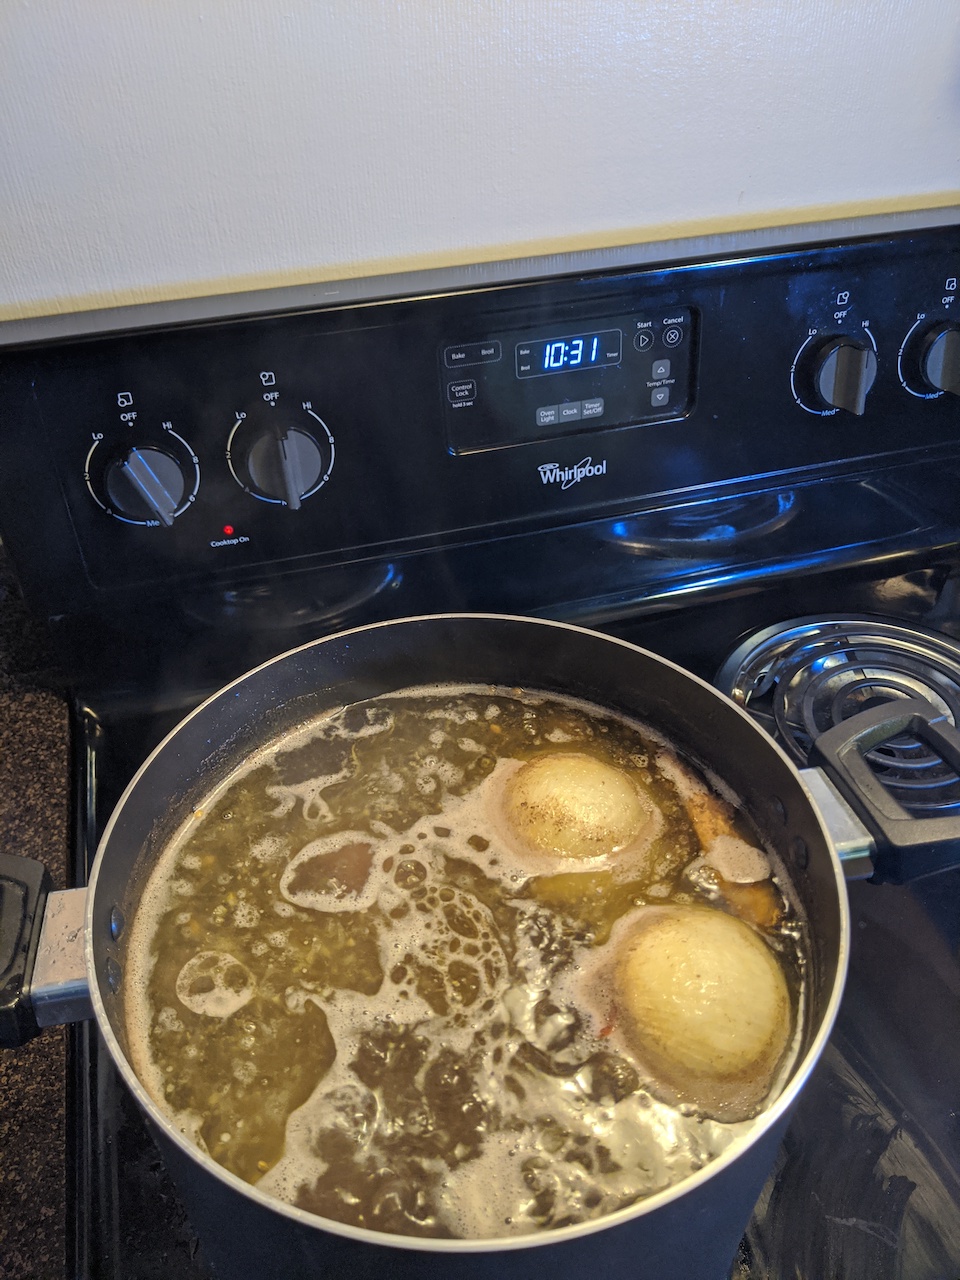
Figure 13. Broth, ~ 1.5 - 2 hours in.
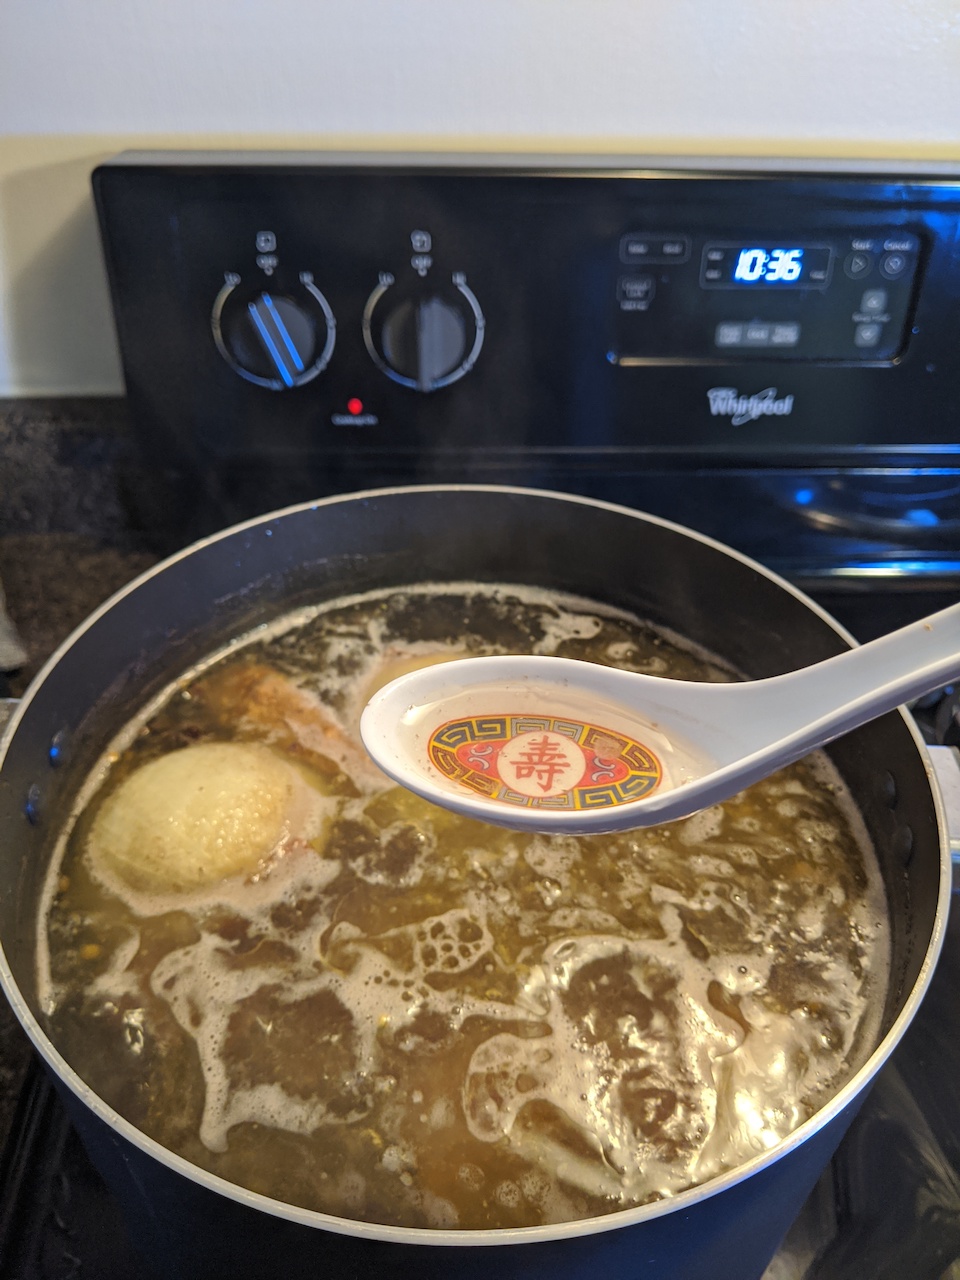
Figure 14. A soup spoon's worth of broth after just 2.5 hours, with little trace of our dissolved protein.
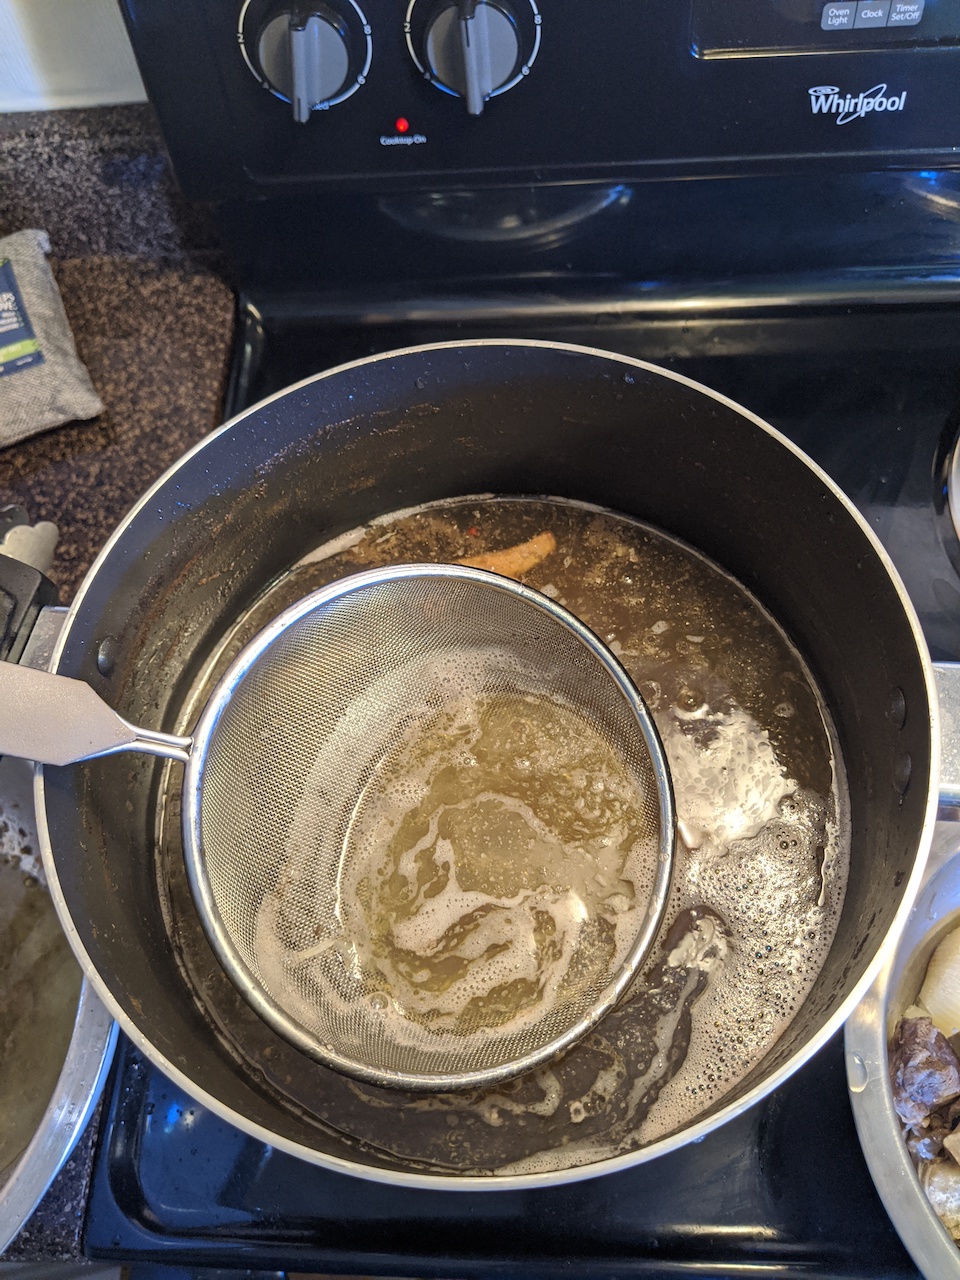
Figure 15. After 4 hours - with a significant reduction in fluid level.
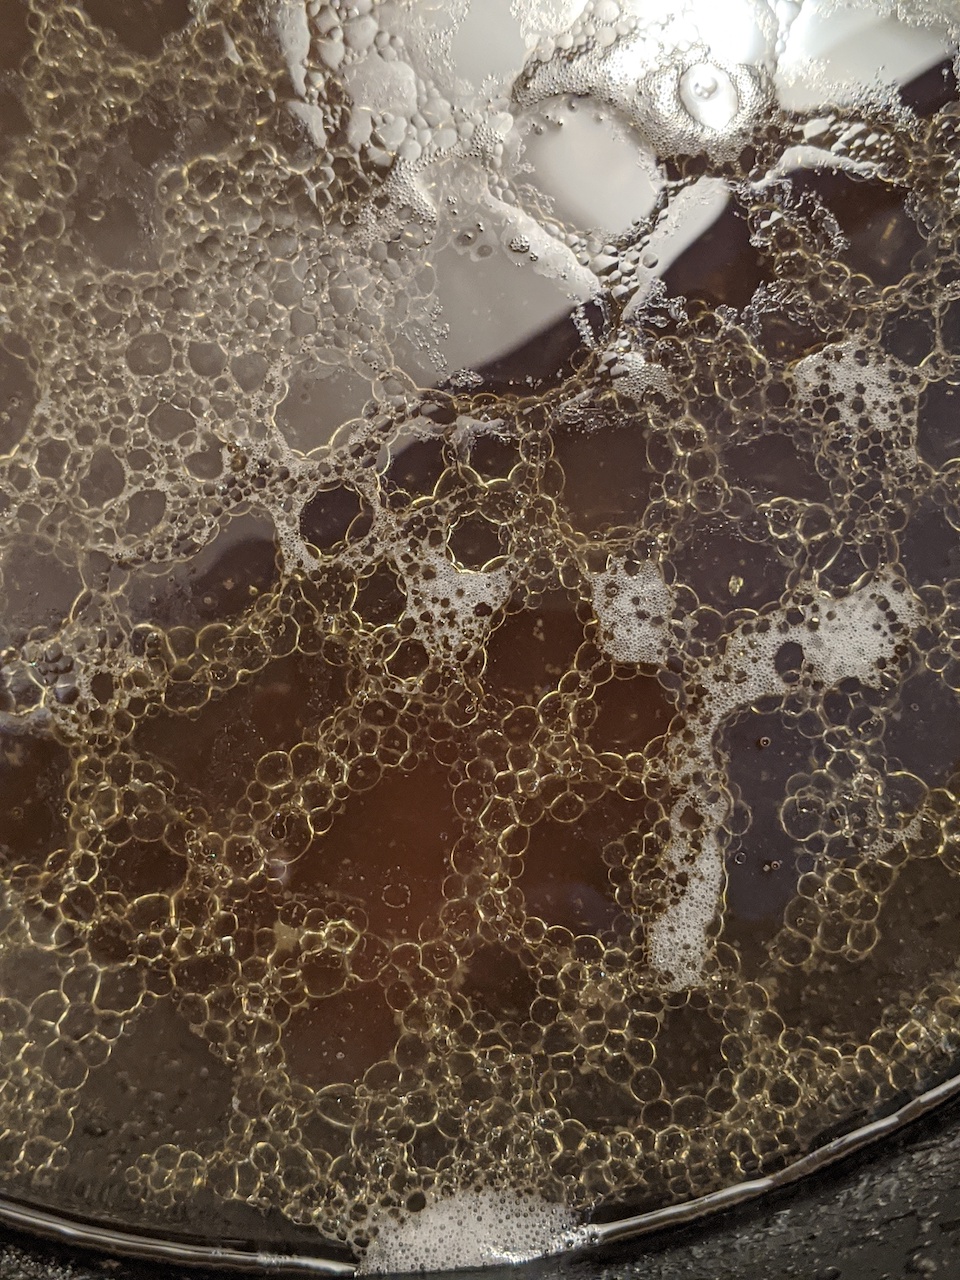
Figure 16.Chains and chains of gelatinous goodness.
-
Garnish
RESULTS
By the 7th hour, the work is largely done. To the scientist's chagrin, the pho broth's flavor is but a covariate in the guests' final perception of the dish. That is, the final composition collectively uses rice noodles, vegetables, sriracha and hoisin sauce, beef tendon and brisket, and lime to elevate one's perceptual impression of deliciousness beyond heaven.
Preparing the Vegetables
Wash and dice your green onions. Wash and dice your cilantro. Keep them separate because cilantro is a divisive preference. Slice your limes into eighths. Choose limes, not lemons, because the your human eyes are more sensitive to green and it'll be more positively received in your imminent instagram photo. (Figure 17)
A note on bean sprouts - bean sprouts are born in humid climates that are conducive to salmonella when brought home and refrigated for a few days. I like putting my water to a boil, dunking the beansprouts (sititng in a small strainer), instantaneously removing them, and soaking in cold (or better yet, ice water) water to retain the crispness and avoiding the risk of salmonella altogether. (Figure 18)
The Noodles
The noodles should be treated similarly. Use scissors to cut the noodles into more manageable bundles and place into a noodle straining basket or a strainer. Then dunk the noodles in the pot for 5 seconds at most, and remove. Drain and notice that they are a perfect softness and that if you put the noodles for 10 seconds, they are ever too soft. (But your friends won't say so because they are too polite.)
Final Taste + Final Skim + The Meat
Taste your soup for a laste time and consider adding that last half tablespoon of salt. Turn the heat off the stove completely and mix the pot in a circulatory motion one last time. Let the pot rest for 20 minutes before performing the final skim of the fat. Place your brisket, beef tendon balls, the ribs, oxtail or other meaty hunks back into the soup to gain some heat before serving to your guests.
Serving
If you serve to your guests immediately, know that the entire mix will be a bit fatty. One preference is to instead cool the broth, remove the bones, refrigerate, skim the risen fat the next day, reheat, and only then to serve. The broth now has additional clarity because the residual fat from the animal bones had veiled the flavor with lipids.
Consider using larger bowls to serve your pho because your friends deserve to be treated. Serve with soup spoons and saucers for the hoison and sriracha. Serve generously to your friends. Save the rest of the pot for the next day and savour this memory of your friendships for rainy days.
ACKNOWLEDGMENTS
No conflicts of interests, such as 'Big Broth'; i.e. no big broth-er watched over the production of this soup. Thank you to my supportive friends for trying out my pho and giving constructive feedback for me to develop on this massive undertaking. I make this broth for you.
Figures - Garnish and Serve
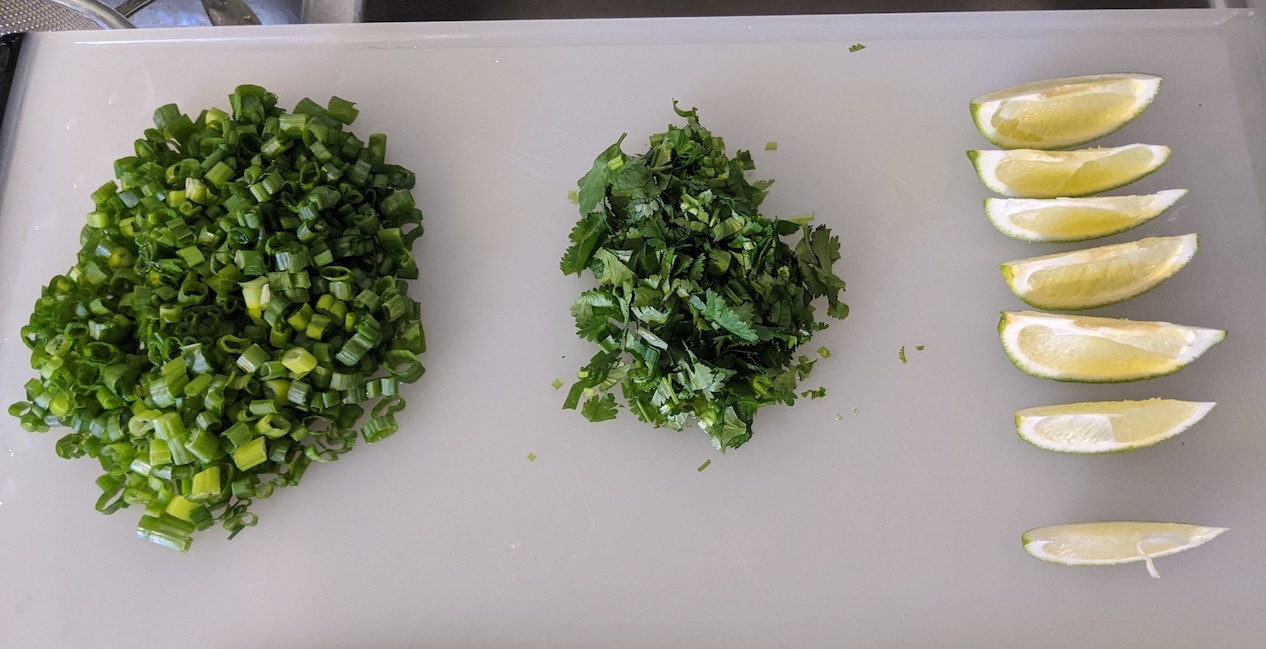
Figure 17. Study the blade.
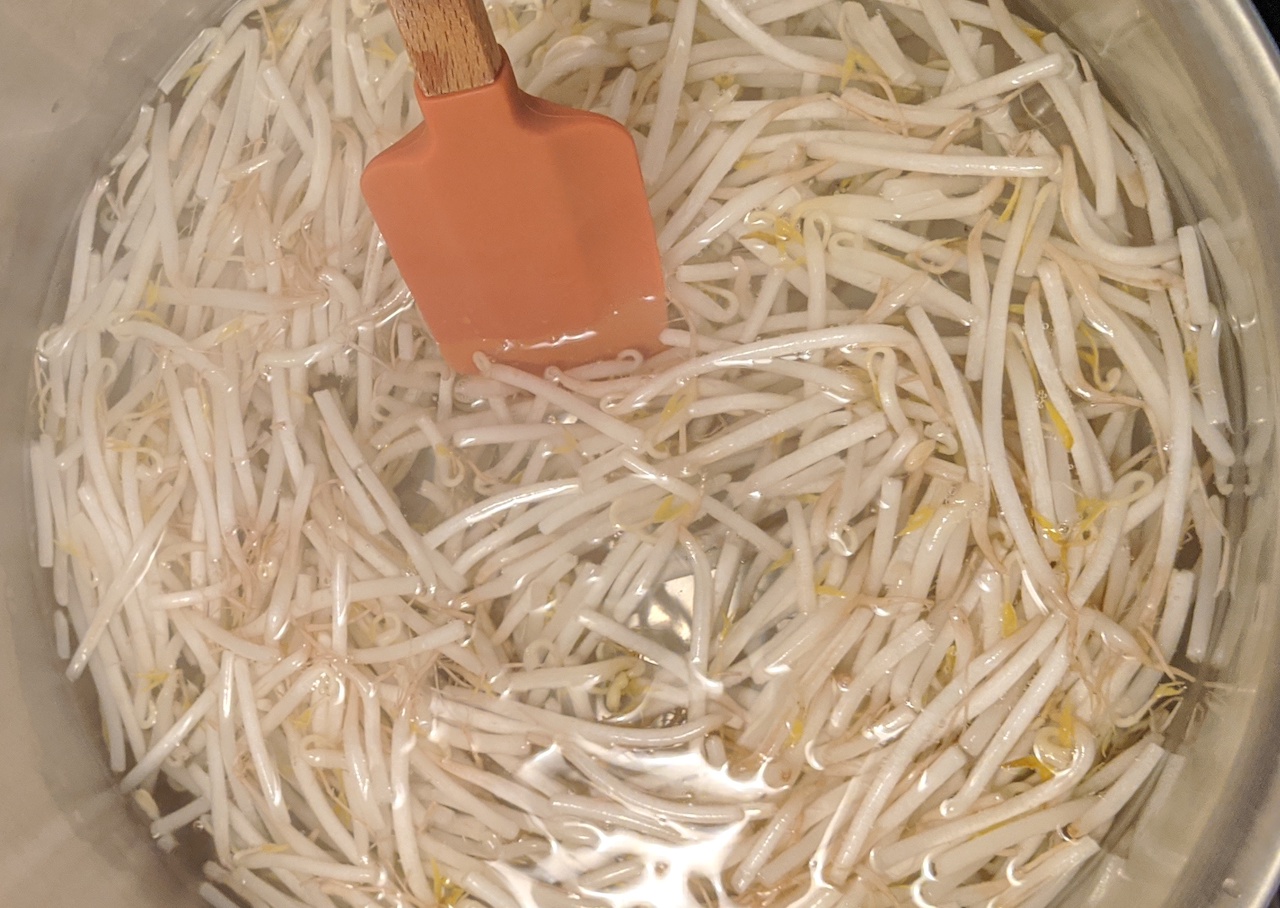
Figure 18. Bean sprouts, quick blanche, through the strainer.
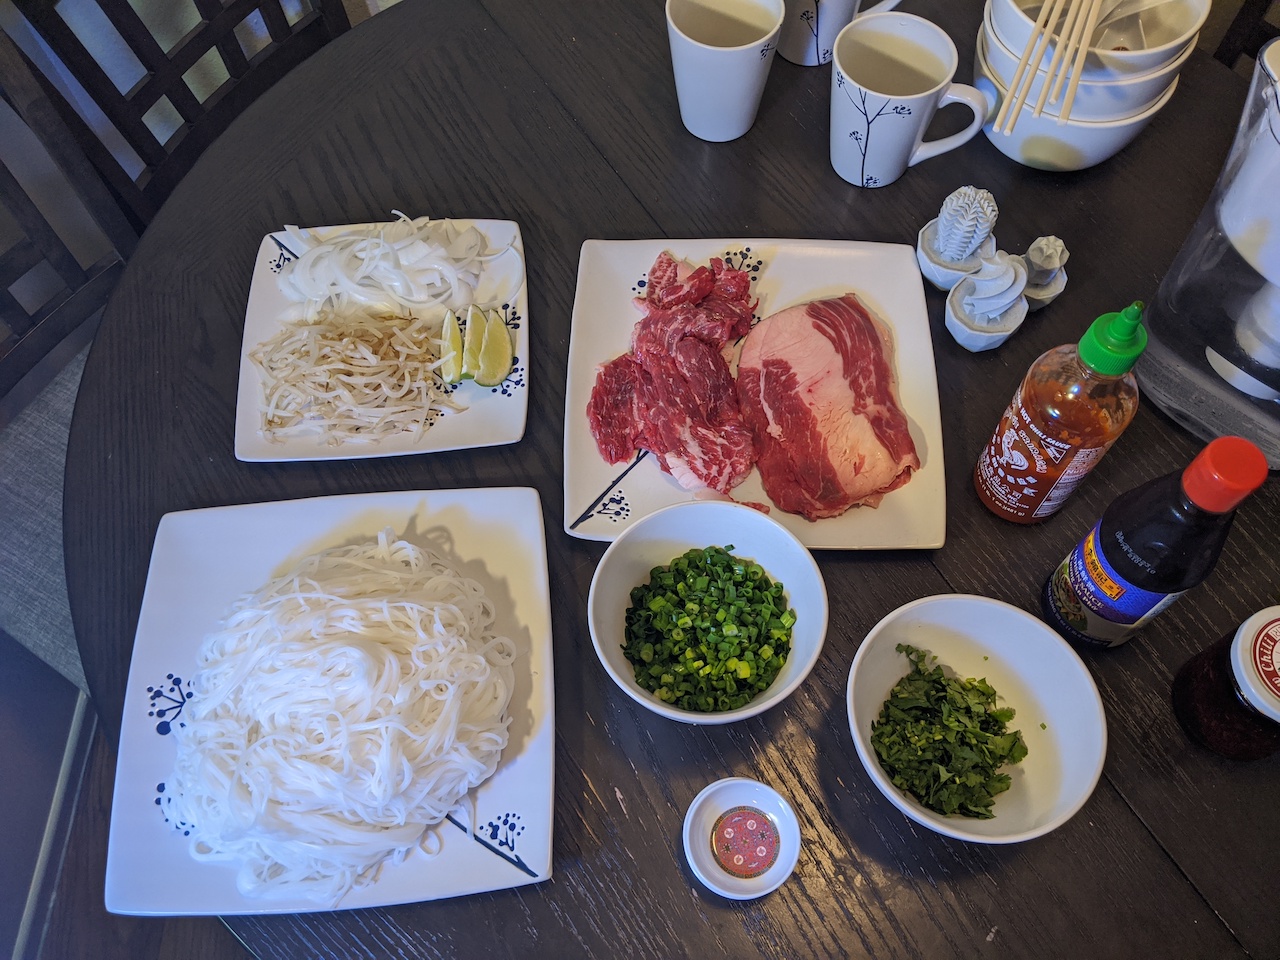
Figure 19. Vegetables, meat, noodles - the gang's all here.
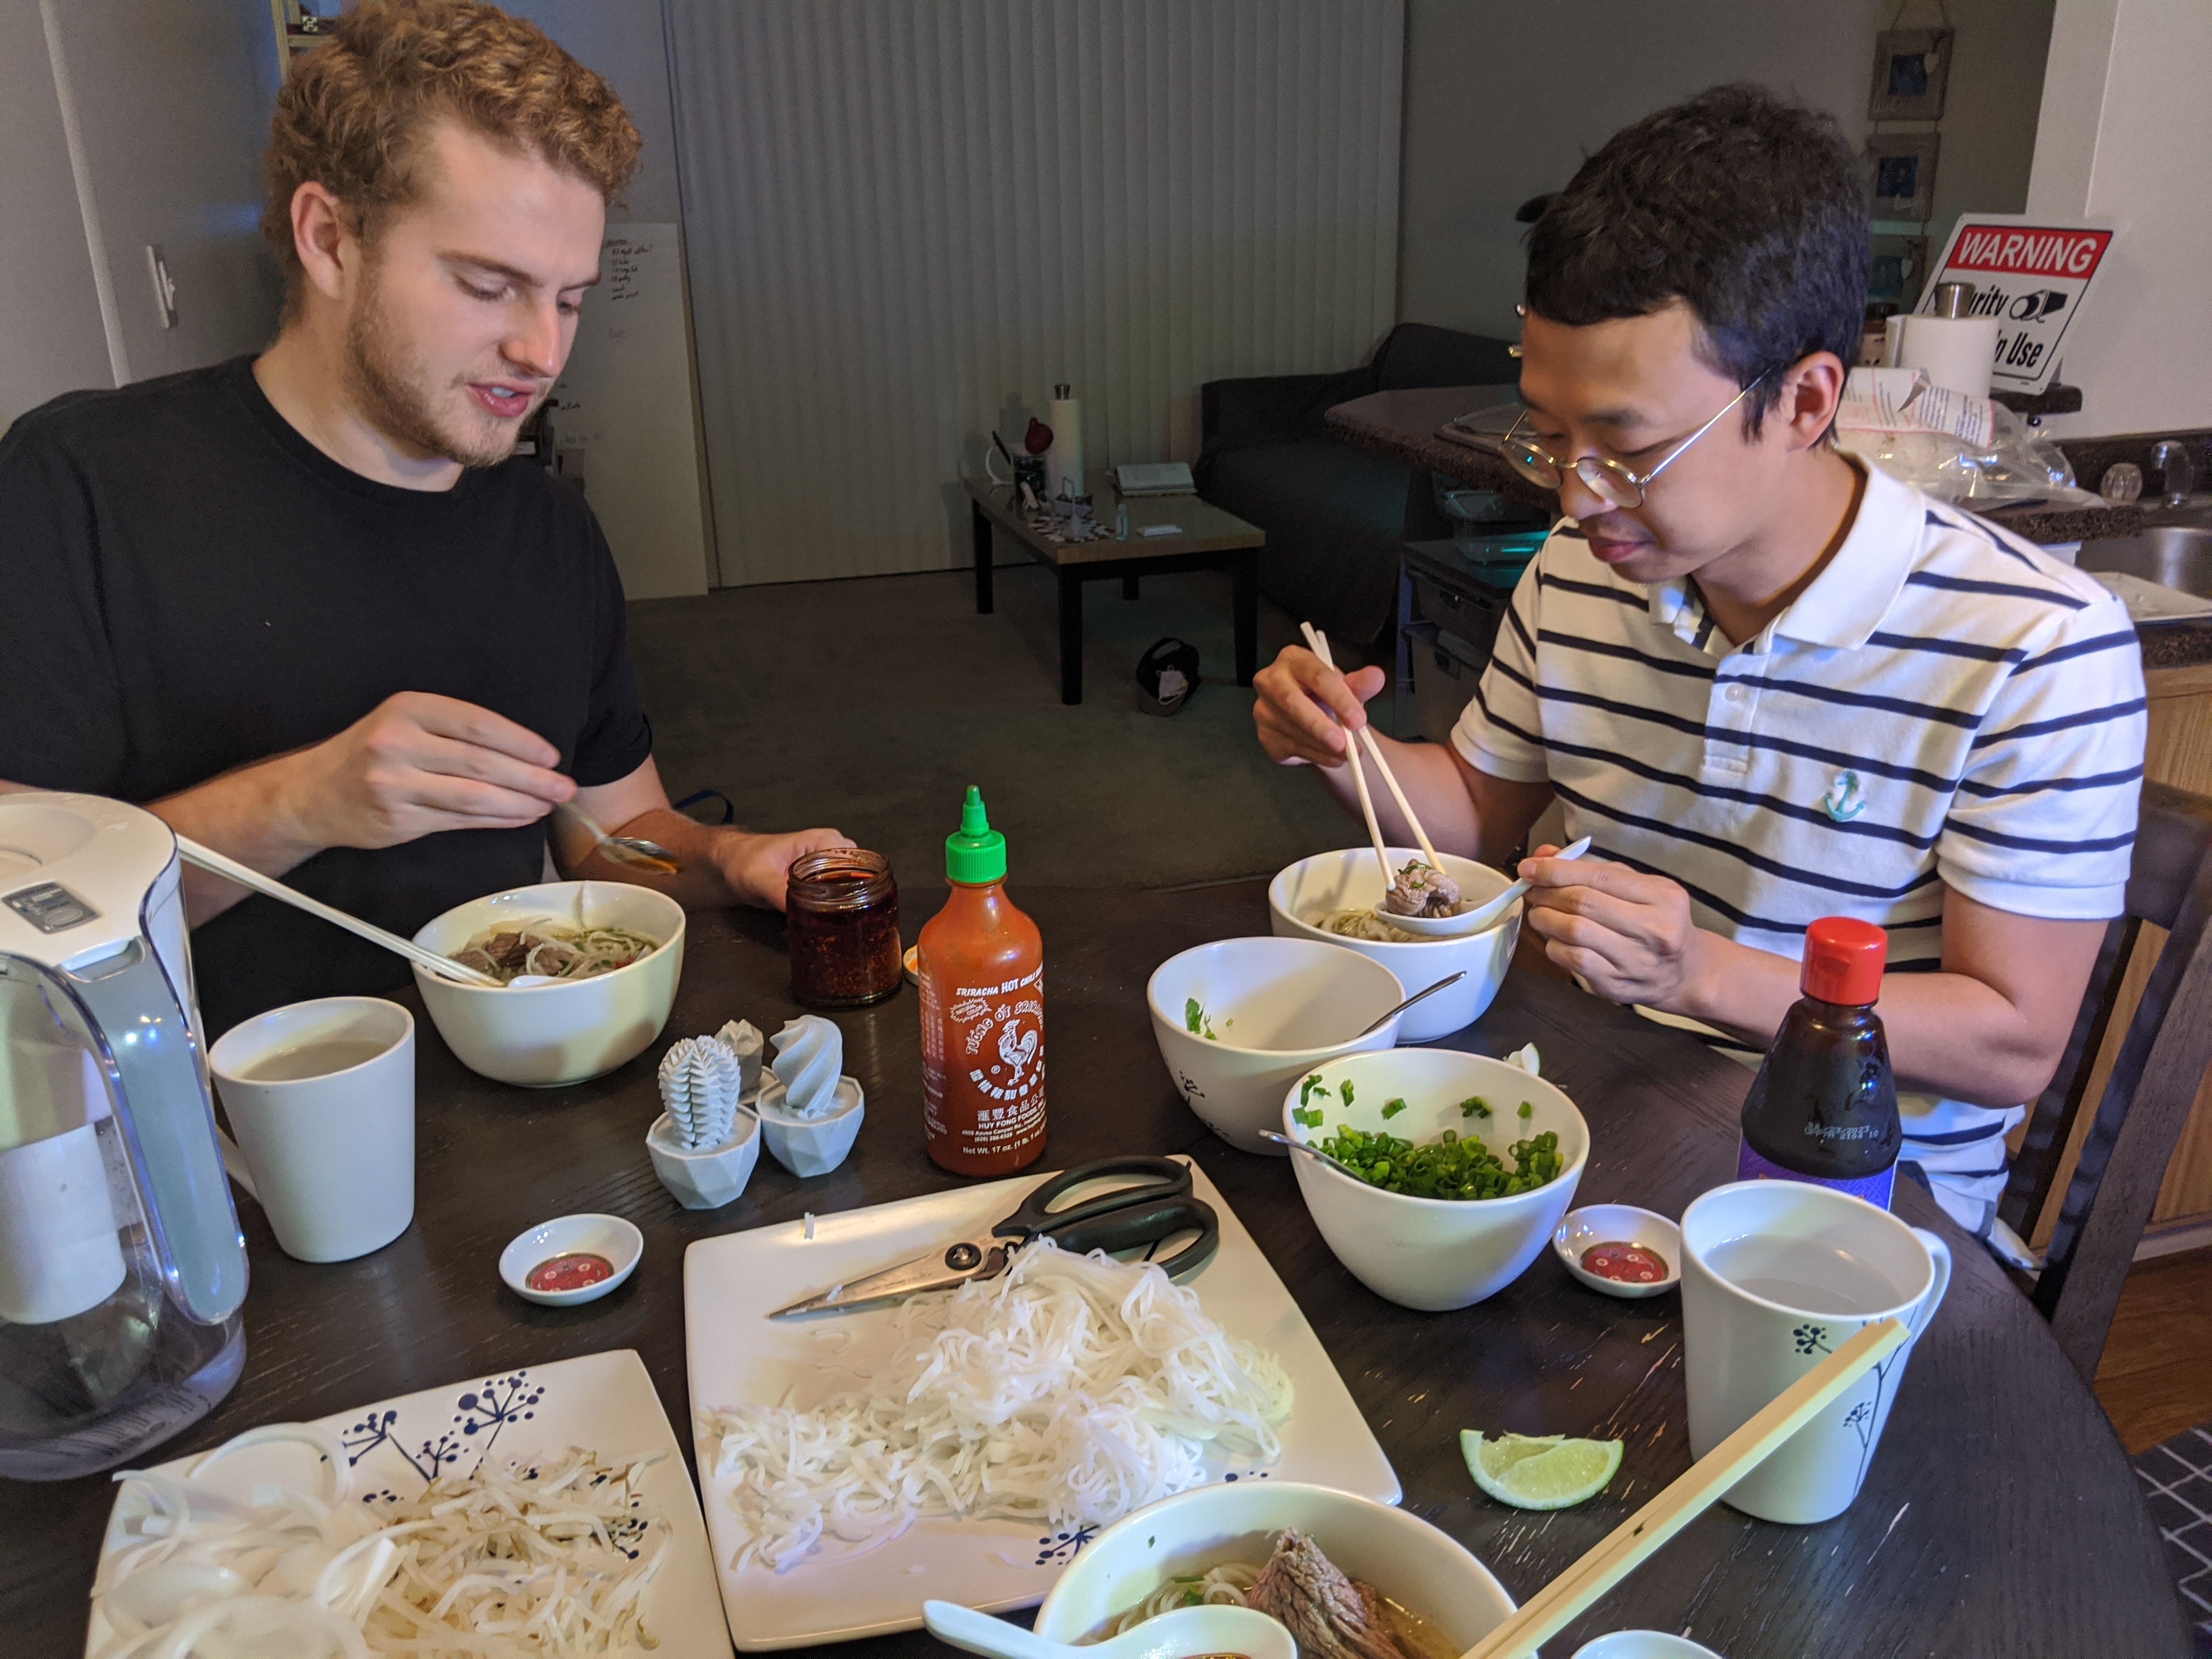
Figure 20. My polite friends who said they enjoyed my soup and also drank it.
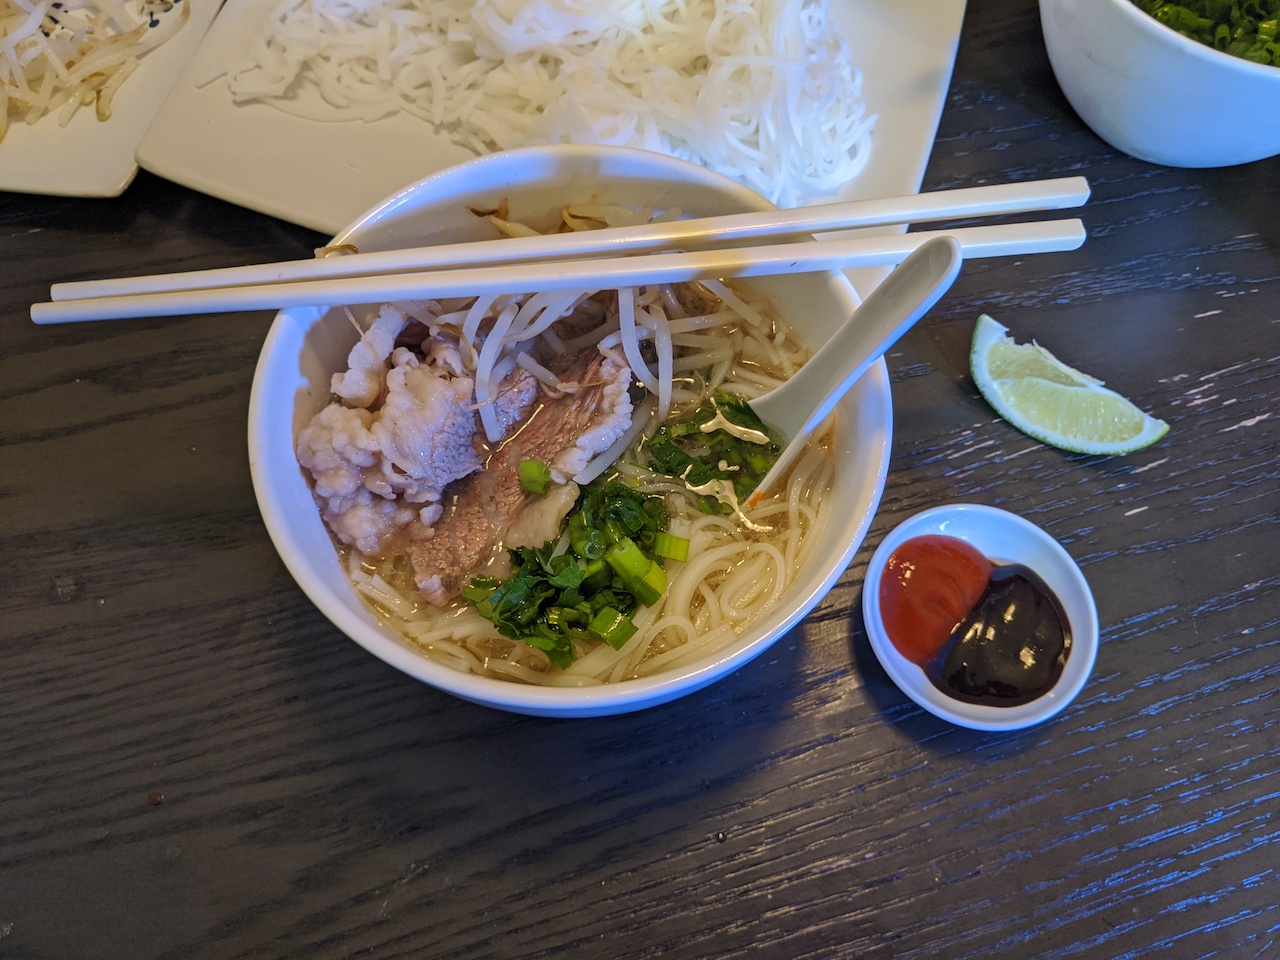
Figure 21. Pho Trial I, 10/18/20.
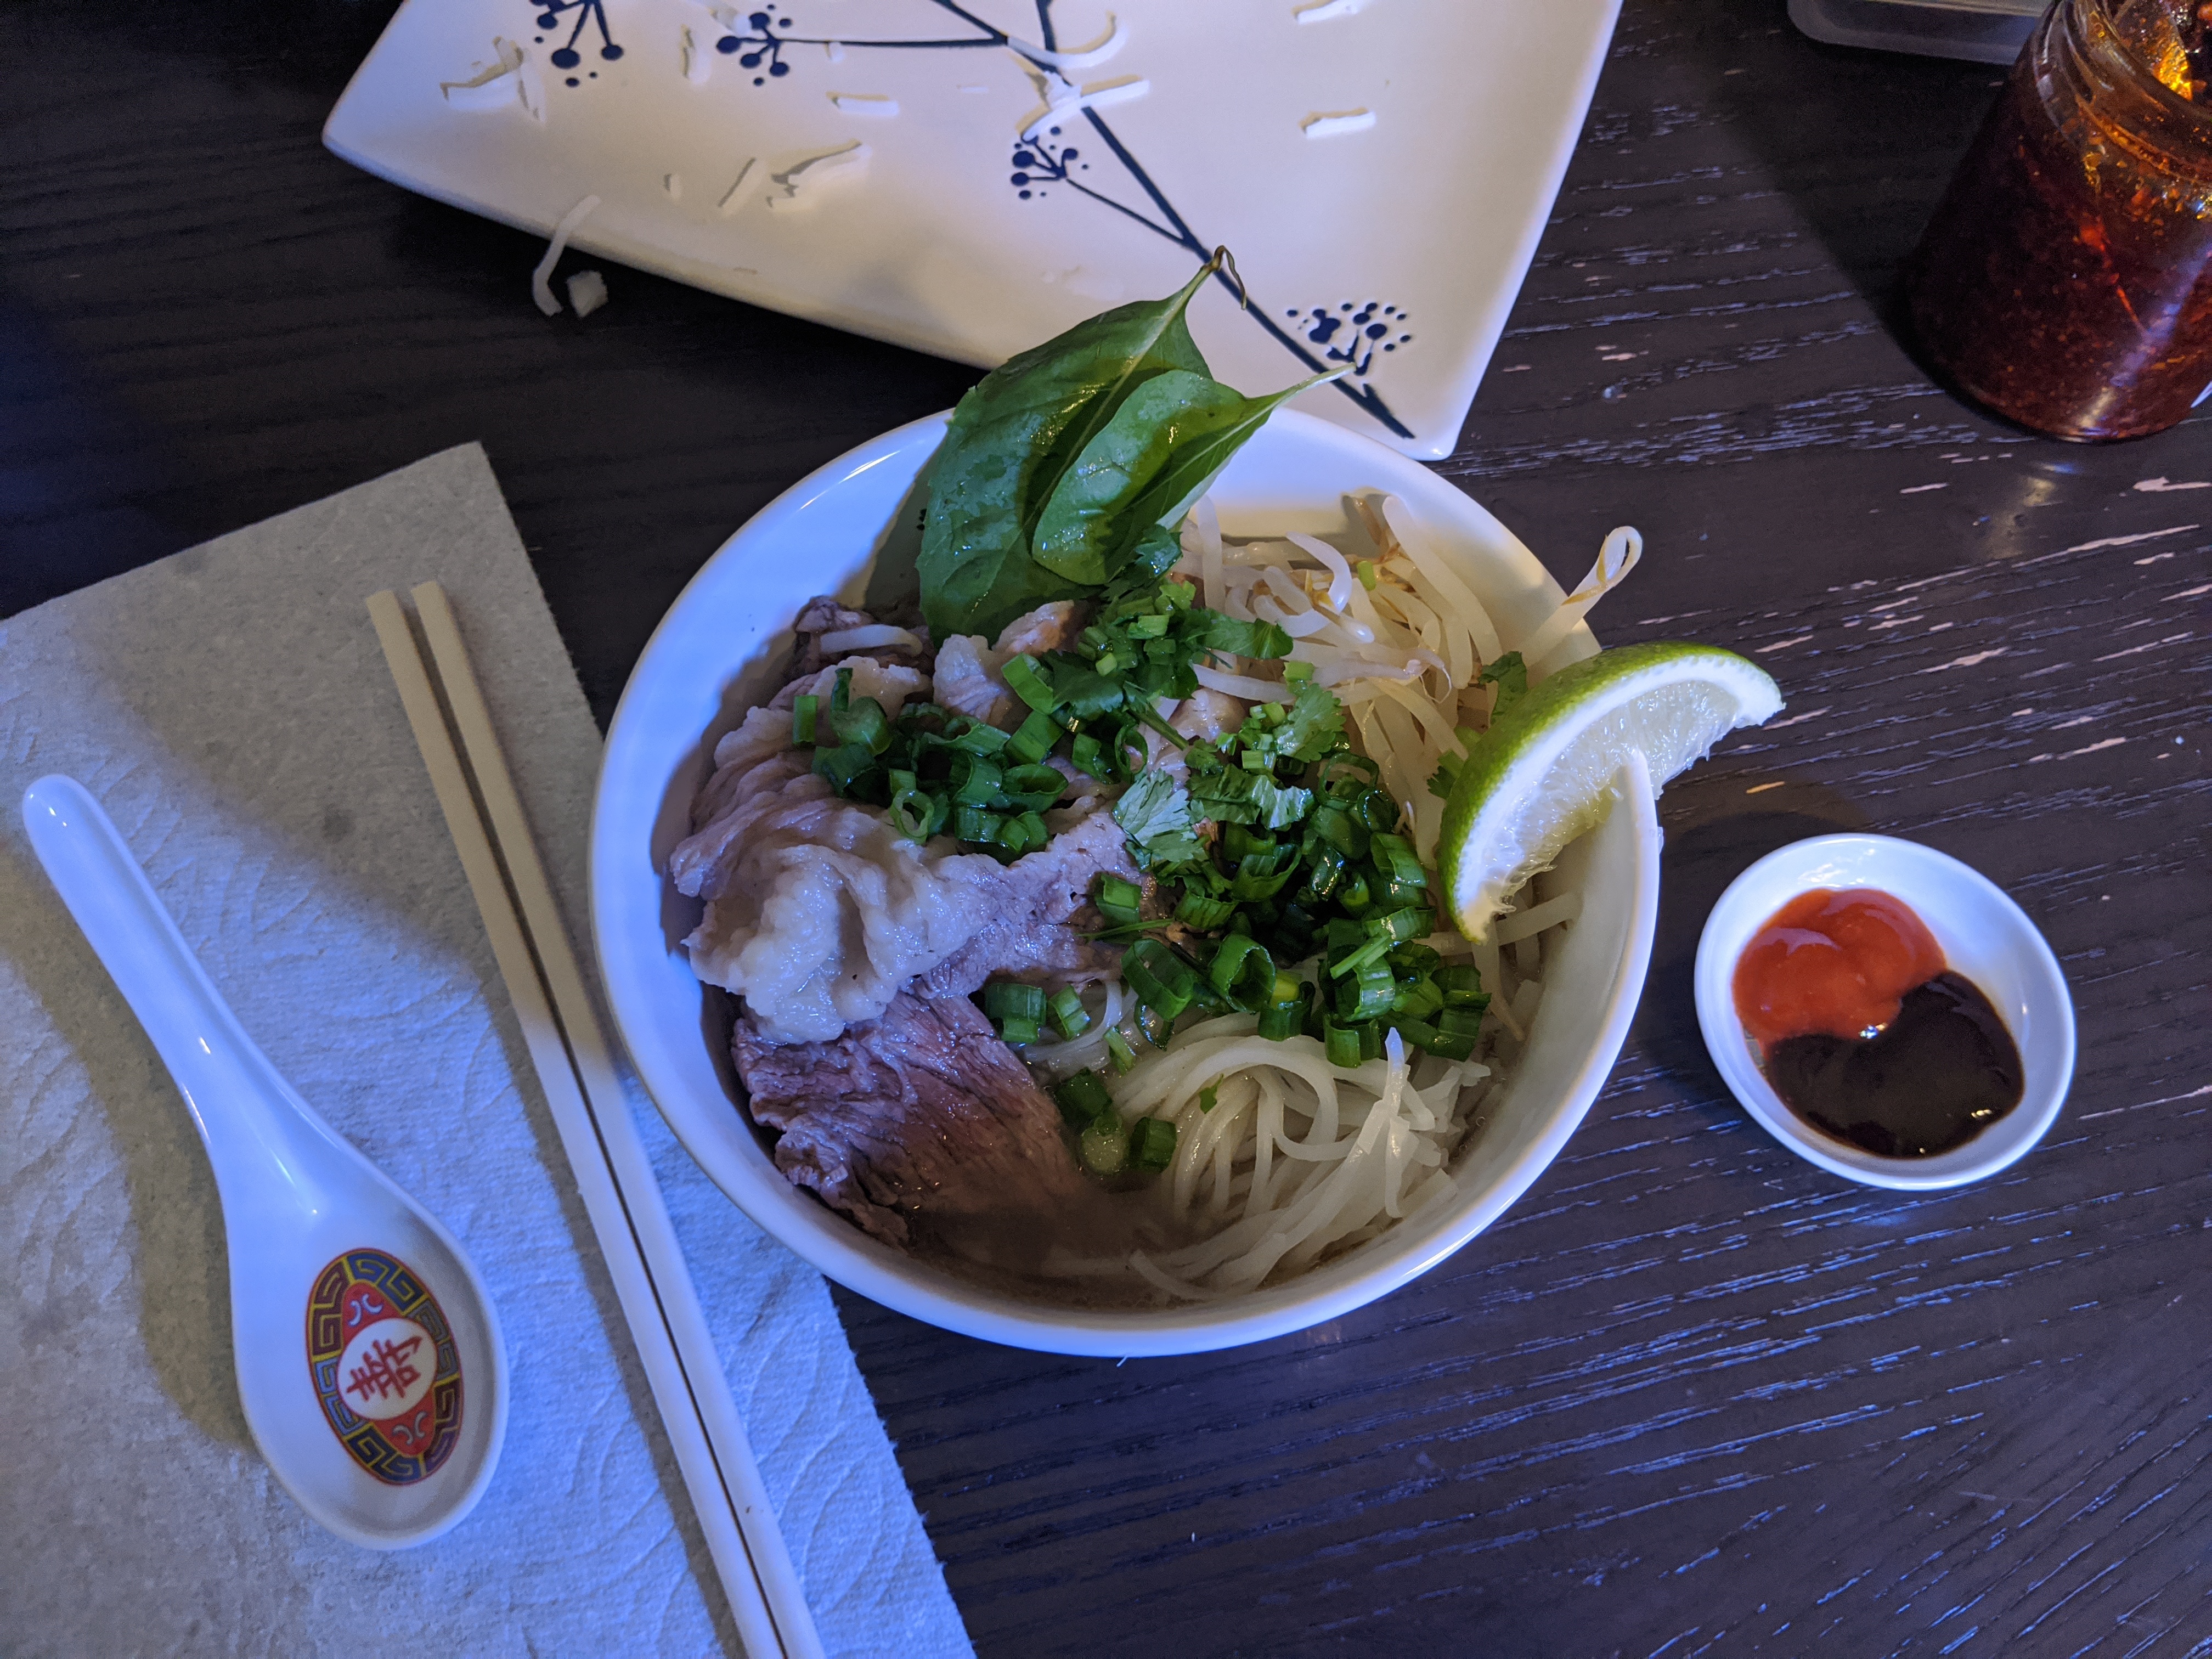
Figure 22. Pho Trial II, 11/19/20. 0.5 tablespoons salt added, additional water, additional 5g of yellow rock sugar, temperature-checking the ribs, blanching the beansprouts shorter.
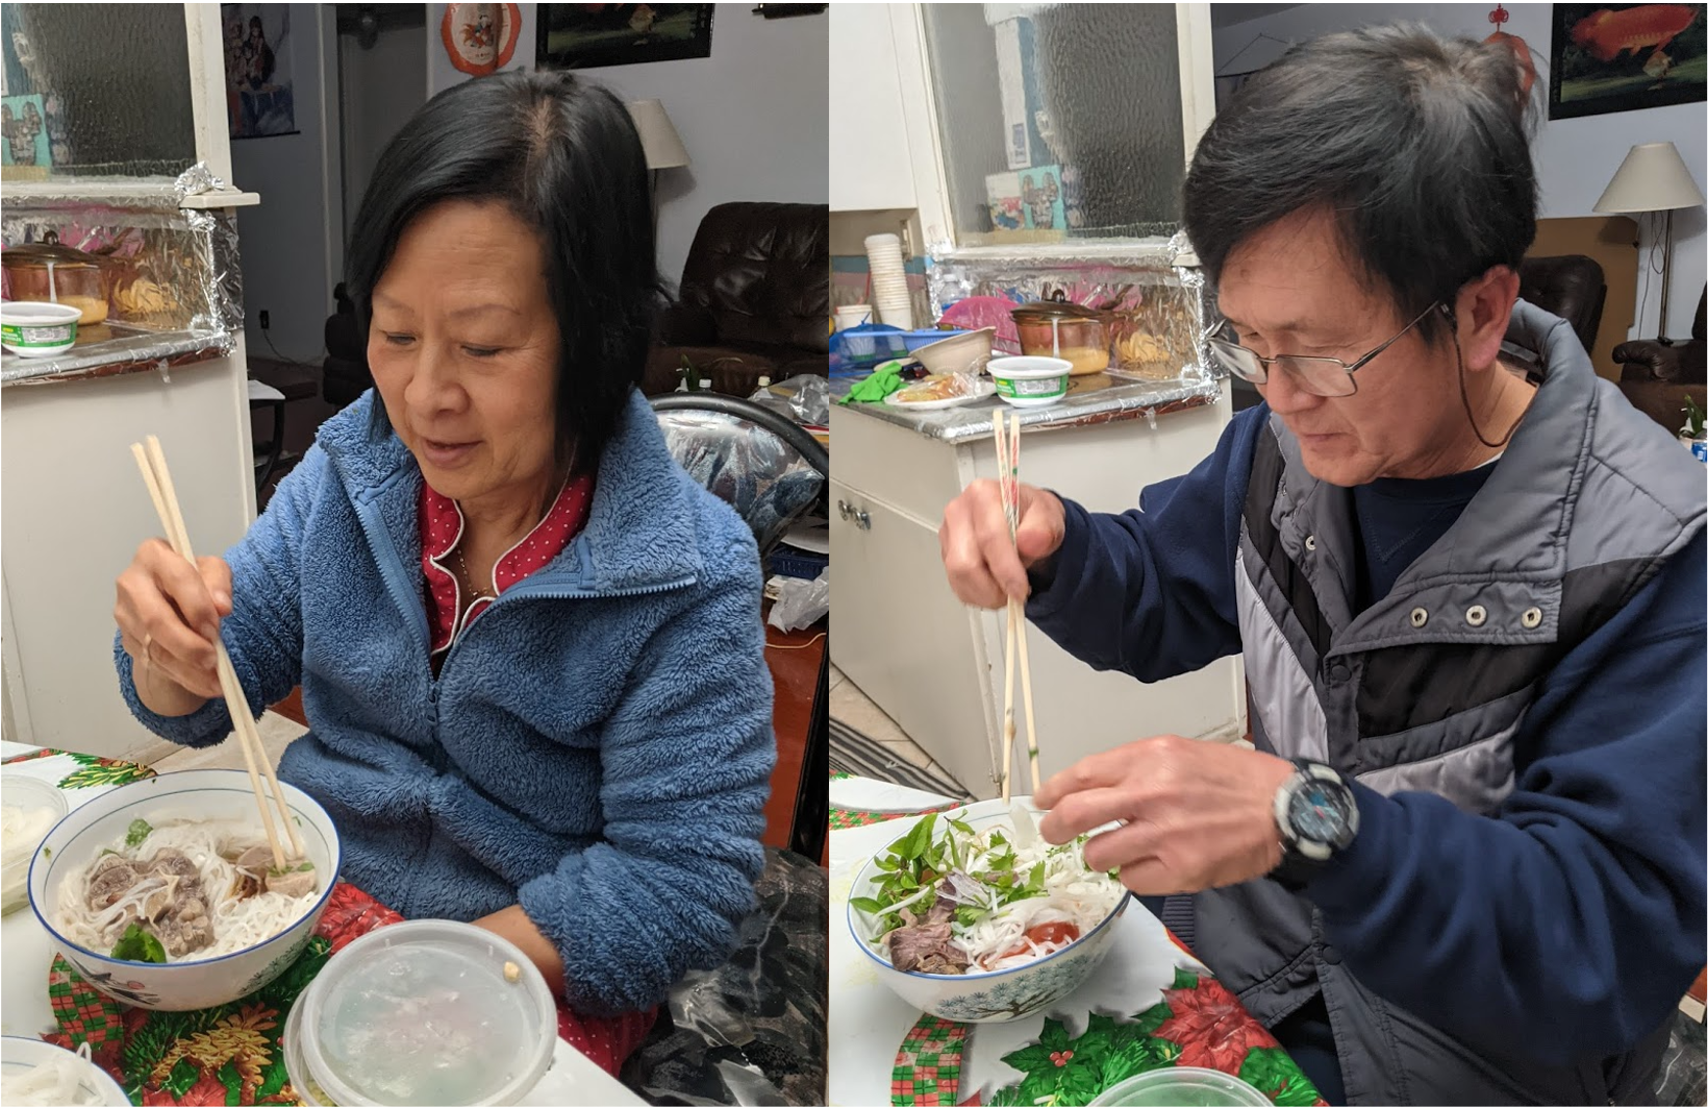
Figure 23. Pho Trial III, 12/28/20. Gas stove, added a lot of additional water, temperature checking the oxtail, more aggressive skimming, cooked together with my sister Jenny.